Quantcast
Channel: Tutorial - Embarcadero Community
Viewing all 503 articles
Browse latest View live

【Delphi / C++Builder Starter チュートリアルシリーズ】 第5回 ‟イベントに合わせて動かしてみよう„ [JAPAN]

$
0
0

【Delphi / C++Builder Starter チュートリアルシリーズ】

第5回 ‟イベントに合わせて動かしてみよう„

 10月24日より始まりました 「Delphi / C++Builder Starter チュートリアルシリーズ」。全10回、12月26日まで、毎週17時より30分間で、無料でダウンロード&利用できる開発環境のDelphi / C++Builder Starter エディションを使用して、ゲームを作るまで一通り、セミナーを実施してまいります。

このブログでは第5回のサマリーと参考情報など掲載いたします。 

なお、前回および初回分の内容に関するブログ記事は以下のリンクからお読み頂けます。

<< 第4回 ‟UI アニメーションの設定„  
<< 第1回 ‟無料で始めよう アプリ作成„ 


[アジェンダ]

  • イベントとイベントハンドラについて知る
  • イベントの種類について知る

[開発環境インストール]

[Delphi / C++Builder Starter チュートリアルシリーズ]  第1回 ‟無料で始めよう アプリ作成„をご参考になり、開発環境をインストールしてください。


[第5回のサンプルコードのダウンロード]

以下のURLよりzip形式でダウンロード頂けます。演習と応用すべてのコードがDelphi/C++の両方とも含まれています。

https://github.com/kazinoue/2016_StarterTutorial_S1-5/archive/master.zip


[演習1] マウスのイベントに処理を書く。

この演習では OnClick, OnDblClick, OnMouseDown, OnMouseUp というイベントに対してイベントハンドラを割り当てました。以下では OnClick に対するコードを例に Delphi と C++ の実装の違いをご紹介しています。


Delphi では文字列はシングルクオートで挟みます。

//
procedure TForm1.Button1Click(Sender: TObject);
begin
	// Lines.Insert は指定の場所に行を差し込む処理です。
	// 0 は 0 行目に差し込む = 先頭行に差し込むことを意味します。
  Memo1.Lines.Insert(0,'シングルクリック');
end;

C++ ではダブルクオートで挟みます。また最初のシングルクオートの前に L と記述していることにも注意が必要です。

また、Memo1.Lines.Insert ではなく、Memo1->Lines->Insert と記述している点も大きな違いです。

//
void __fastcall TForm2::Button1Click(TObject *Sender)
{
	// 文字列を記述するときは L"" と表現します。
	// Delphi では Memo1.Lines.Insert と記述しましたが、
	// C++ の場合は . のかわりに -> を用いている点にご注意ください。

	// Lines->Insert は指定の場所に行を差し込む処理です。
	// 0 は 0 行目に差し込む = 先頭行に差し込むことを意味します。
	Memo1->Lines->Insert(0,L"シングルクリック");
}


[演習2] キー操作のイベントに処理を書く。

この演習では OnKeyDown のイベントで「入力可能文字のキー入力」と「Enter や Shift などの特殊キー」で値の取得が異なることを学びました。

入力可能な文字は KeyChar で、特殊キーの情報は Key で渡されます。このときに Key は数値型であるため、これを文字列型に変換せねばなりません。このときの書き方が Delphi と C++ では異なります。

Delphi

//
procedure TForm1.Memo1KeyDown(Sender: TObject; var Key: Word; var KeyChar: Char;
  Shift: TShiftState);
begin
  Edit1.Text := KeyChar;

	// Key は Word型 = 数字型なので、Edit2 で表示するためには
	// 文字列型に変換せねばならない。
  Edit2.Text := Key.toString;
end;

C++

//
void __fastcall TForm2::Memo1KeyDown(TObject *Sender, WORD &Key, System::WideChar &KeyChar,
          TShiftState Shift)
{
	Edit1->Text = KeyChar;

	// Key は WORD型 = 数字型なので、Edit2 で表示するためには
	// 文字列型に変換せねばならない。
	Edit2->Text = IntToStr(Key);
}


[演習3] 一定時間ごとに発生するタイマーイベントを使う。

この演習では現在の日時を Memo に表示する周期を interval で変えました。現在の日時は Now() という関数で取得できますが、それを文字列型に変換するために DateTimetoStr() という関数を組み合わせています。

これについては Delphi と C++ で大きな違いはありません。

//

procedure TForm1.Button3Click(Sender: TObject);
begin
  Memo1.Lines.Insert(0,'インターバルを 500 に変更します');
  Timer1.interval := 500;
end;

procedure TForm1.Timer1Timer(Sender: TObject);
begin
  // 現在の日付時刻は Now() で取得できます。
  // 取得した値は TDateTime 型であり、これはそのまま表示できないため、
  // DateTimetoStr() という関数で文字列型に変換しています。
  Memo1.Lines.Insert(0,DateTimetoStr(Now()));
end;


//
void __fastcall TForm2::Button2Click(TObject *Sender)
{
	Memo1->Lines->Insert(0,L"インターバルを 2000 に変更します");
	Timer1->Interval = 2000;
}
//---------------------------------------------------------------------------

void __fastcall TForm2::Timer1Timer(TObject *Sender)
{
	// 現在の日付時刻は Now() で取得できます。
	// 取得した値は TDateTime 型であり、これはそのまま表示できないため、
	// DateTimetoStr() という関数で文字列型に変換しています。
	Memo1->Lines->Insert(0,DateTimeToStr(Now()));
}


[演習4] アプリケーション起動や終了時のイベントを使う。

この演習では onFormCreate や onFormDestroy でアプリの起動時や終了時のイベントを扱ってみました。このような処理はアプリの終了時に状態を保存したり、アプリの起動時に保存済みの状態を復元するなどの実装に使えます。

自体は基本的にこれまでの演習の内容と大差ありません。

//
procedure TForm1.FormCreate(Sender: TObject);
begin
  ShowMessage('起動時のメッセージ');
end;

procedure TForm1.FormDestroy(Sender: TObject);
begin
  ShowMessage('終了時のメッセージ');
end;
//
void __fastcall TForm2::FormCreate(TObject *Sender)
{
  ShowMessage(L"起動時のメッセージ");
}
//---------------------------------------------------------------------------
void __fastcall TForm2::FormDestroy(TObject *Sender)
{
  ShowMessage(L"終了時のメッセージ");
}


[応用] アナログ時計を作ってみる

これまでに紹介した内容と、いくつかのシェイプのコンポーネントを使うと、アナログ時計が作れます。

時計の針の角度は、シェイプのコンポーネントの RotationAngle プロパティを変えるだけで描画できますから、特に難しいことはなく、単に針の角度の計算を正しく行えばよいのです。実際の実装は以下の通りですが、実質的なコードは20行もなく、それぞれの針の角度を計算して RoundRect.RotationAngle に設定することと、Edit1 への現在時刻の表示しかしていません。

なお、このサンプルコードでは時刻を取り扱うために「変数」を用いています。変数については次回の第6回でご説明します。

//
procedure TForm1.Timer1Timer(Sender: TObject);
var
  // 日付時刻型です。現在の日時を取り扱います。
  timestamp: TDateTime;

	// 時、分、秒は小数点が扱える数値型にします。
	// これは後述する角度の計算で小数点を含む計算が必要となるからです。
  Hour:    Double;
  Minutes: Double;
  Second:  Double;

begin
  timestamp := Now();

  // 秒を取得する処理
  Second := SecondOf(timestamp);

	// 秒針の角度を変える。
	// 1秒の角度は 360 / 60 = 6 なので、
	// それを用いてコンポーネントの表示角度を変えている。
	// なお、回転の中心位置は予め RotationCenter のプロパティで設定済み。
  RoundRectSecond.RotationAngle := Second * 6;


  // 分を取得する処理
  Minutes := MinuteOf(timestamp);

	// 分針の角度を変える。
	// 1分の角度は 360 / 60 = 6 なので、Minutes * 6 で一応は角度が計算できる。
	// しかし1分の動きが6度ということは10秒で1度動くわけで、この動きを無視することはできない。
	// よって使用する分の値に小数点以下で秒の値を混ぜ込むようことで滑らかに動かすようにする。
  RoundRectMinute.RotationAngle := ( (Minutes + (Second/60) ) * 6);


  // 時を取得する処理
  Hour := HourOf(timestamp);

	// 時針の角度を変える。
	// 1時間の角度は 360 / 12 = 30 だから Hour * 12 でもよいのだが、
	// これでは時針の動きが雑すぎるので分単位の動きは必須。
	// だから分単位の値を小数点以下に混ぜ込んで使う。
	// ただし秒単位の処理は省略してよい。なぜなら時針は2分間で1度しか動かないのに
	// 秒単位の動きを正確に再現しても認識できないから。
  RoundRectHour.RotationAngle := ( Hour + (Minutes/60) ) * 30;

	// しかし、どうしても秒単位の動きにも正確に追従させたいならこちらの計算式を使う。
  // RoundRectHour.RotationAngle := ( Hour + ( (Minutes+(Second/60)) /60) ) * 30;

  // 現在時刻のデジタル表示を TMemo に出力する。
  Edit1.Text := TimeToStr(timestamp);
end;


C++

//
void __fastcall TForm1::Timer1Timer(TObject *Sender)
{
	// 日付時刻型です。現在の日時を取り扱います。
	TDateTime timestamp;

	// 時、分、秒は小数点が扱える数値型にします。
	// これは後述する角度の計算で小数点を含む計算が必要となるからです。
	Double Hour;
	Double Minutes;
	Double Second;


	// 現在の日時を取得します。
	timestamp = Now();


	// 秒を取得する処理
	Second = SecondOf(timestamp);

	// 秒針の角度を変える。
	// 1秒の角度は 360 / 60 = 6 なので、
	// それを用いてコンポーネントの表示角度を変えている。
	// なお、回転の中心位置は予め RotationCenter のプロパティで設定済み。
	RoundRectSecond->RotationAngle = Second * 6;


	// 分を取得する処理
	Minutes = MinuteOf(timestamp);

	// 分針の角度を変える。
	// 1分の角度は 360 / 60 = 6 なので、Minutes * 6 で一応は角度が計算できる。
	// しかし1分の動きが6度ということは10秒で1度動くわけで、この動きを無視することはできない。
	// よって使用する分の値に小数点以下で秒の値を混ぜ込むようことで滑らかに動かすようにする。
	RoundRectMinute->RotationAngle = ( (Minutes + (Second/60) ) * 6);


	// 時を取得する処理
	Hour = HourOf(timestamp);

	// 時針の角度を変える。
	// 1時間の角度は 360 / 12 = 30 だから Hour * 12 でもよいのだが、
	// これでは時針の動きが雑すぎるので分単位の動きは必須。
	// だから分単位の値を小数点以下に混ぜ込んで使う。
	// ただし秒単位の処理は省略してよい。なぜなら時針は2分間で1度しか動かないのに
	// 秒単位の動きを正確に再現しても認識できないから。
	RoundRectHour->RotationAngle = ( Hour + (Minutes/60) ) * 30;

	// しかし、どうしても秒単位の動きにも正確に追従させたいならこちらの計算式を使う。
	// RoundRectHour->RotationAngle = ( Hour + ( (Minutes+(Second/60)) /60) ) * 30;

	// 現在時刻のデジタル表示を TMemo に出力する。
	Edit1->Text = timestamp.FormatString(L"hh:nn:ss");

}

なお、時計を1秒単位で表示するための TTimer では、OnTimer イベントの Interval を 500ms 以下に設定するほうがよいでしょう。たとえば、1秒単位の TTimer イベントで 17:15:00 という時刻を取り扱う場合に、もしかするとミリ秒単位の時刻は 17:15:00.000 かもしれませんし、あるいは 17:15:00.999 かもしれません。つまり1秒単位でのイベント処理では現実の時刻に対して表示上の時刻が1秒ずれる恐れがあります。しかしイベントの発生周期を500ms単位にすれば、現実の時刻とのズレは0.5秒以内に収まります。(github で公開中のサンプルコードでは100ms単位で設定しています)


■次回は11月28日(月)17:00より  “ミニゲームを作ってみよう„ をお送りします。


それでは、また来週!

<< 第4回 ‟UI アニメーションの設定„ 
>> 第6回 ‟ミニゲームを作ってみよう„ 


InterBase Roadmap Update

$
0
0

Disclaimer: The information included in this roadmap does not constitute, and should not be construed as, a promise or commitment by Embarcadero to develop, market or deliver any particular product, feature or function. The timing and content of Embarcadero’s future product releases could differ materially from the expectations discussed here. Embarcadero reserves the right to change its product plans or roadmap at any time.

Overview

It’s been a busy couple of years since the last public roadmap. In that time, the patent pending Change Views feature has delivered some massive competitive advantage win stories to customers using InterBase XE7 and InterBase was nominated for and won the prestigious IoTA (Internet of Things Award) for “Most Innovative Use of Data”.

Following on from the previous public roadmap InterBase has been on the rise, and here we are sharing the current plans for the next release of InterBase in 2017.

Features and Technologies Delivered in InterBase XE7

The major features delivered in XE7 can be seen in the InterBase XE7 DocWilki

In summary:

Change Views 64bit Linux Server added Performance Improvements 64bit Transaction ID’s – Allowing systems with the highest demand to run even longer New ODS restore feature OpenSSL upgrades Enhanced Journal Archive Management Service API’s for Online Dump and Journal Operations.

Features and Technologies Expected in InterBase BigBang

This week (15-Nov-2016) at CodeRage the hood was taken off a number of things that have been worked on in the labs for project BigBang. This project will ultimately become the next release of InterBase and includes:

A focus on SQL Features Derived Tables Common Table Expressions Truncate Table – A fast way to delete data Transaction Wait Time Exclusive Isolation Levels ISQL scripting enhancements Faster core engine Server-wide Performance Monitoring New Platform Support Latest Mobile & Desktop InterBase ToGo on Linux

Ideas for the future.

InterBase releases are based on a specific On Disk Structure (ODS). The ODS helps manage new features and tells the InterBase engine what the database can do and what performance benefits it can take account of. This is one of the reasons is important to backup and restore when upgrading. – But what has this to do with the future?

Making mid-cycle ODS changes is something that we have been very reluctant to do with InterBase in the past because a change to the ODS will prevent you from using the database on an early version. E.g. if Update 2 had a newer ODS, then you would not be able to move back to Update 1 if you wished to.  With the changes added for managing ODS in the restore in XE7, we are now comfortable that if we need to, we could move up an ODS during a release cycle. This may pave the way to new features mid-release.

Ideas under review for the future include

Auditing Scale Out / Load Balancing Even Smarter, Faster Engine More SQL features Change Views 2.0 Change views working on Views Option for Backup / Restore (rather than DataDump) Enhanced Tooling (e.g. IBConsole) Enhance Drivers for 3rd Party Tools (e.g. More ODBC, JDBC, ADO.Net enhancements) Coded functions (enabling UDF capabilities with ToGo where platforms do not allow external libraries, e.g. iOS)


The post InterBase Roadmap Update appeared first on Stephen Ball's Technical Blog.

Increase productivity with Quick Edits in Berlin Anniversary Edition

$
0
0

Introduced in RAD Studio Berlin Update 2 Anniversary Edition, Quick Edits is a great new IDE productivity feature for VCL developers.

Using the Form Designer, Quick Edits allow you to rapidly modify the name, caption, alignment, layout and color of a control, copy the component name, quickly layout a form from a template, connect images and image lists, and bind the control to a data source or data field.

Building and Deploying a Local Appx Package

$
0
0

With Delphi (and C++Builder) Berlin Update 2, you have the ability to create and deploy on the local machine an Appx package, leveraging the Microsoft Desktop Bridge (aka Centennial Bridge). The IDE also support deployment for Windows Store, using slightly different steps.

However some of the steps are far from obvious, particularly including generating and registering a self-signed certificate. This blog post highlights some of the steps need, and the related video (extracted from one of my CodeRage sessions) show all of the steps in details, going from a vanilla version of Update 2 to the APPX deployment.

Detailed Content

The video covers:

- Configuring the Windows SDK in the IDE to enable the execution of the required SDK utilities

- Creating a self-signed certificate from the IDE

- Creating a project and build it for store deployment, configuring the provisioning page

- Looking into the list of deployed file and in particular into the Appx manifest file

- Installing the self-signed certificate among the trusted certificates on the local machine (for this step, there is a detailed description below)

- Installing the Appx package on a machine, uninstalling it, looking at the file system location where it is stored and the versioning model

The Video

The video in itself is slightly over 10 minutes, and you can see it on YouTube at https://youtu.be/_GNPT9Cvyag.

Further Instructions for Certificate Registration

To import the certificate having the .pfx file generated by the RAD Studio IDE:In File Explorer, select the certificate file and use the Install PFX local menu item:

In the Store Location group, select Local Machine Click Next and OK to confirm the UAC dialog Confirm the certificate file selection Enter your certificate password In the next screen of the Certificate Import Wizard, change the selected option to "Place all certificates in the following store" Click Browse. In the Select Certificate Store window, scroll down and select Trusted People and click OK Click Next. A "Completing... " screen appears Click Finish

As an alternative, you can import the certificate from the Appx package (like a customer would) and in this case the password won't be requested:

In File Explorer, right click an Appx that you've signed with the certificate (most likely the Appx package you want to install) and choose Properties from the context menu. Click the Digital Signatures tab Click on the certificate and choose Details Click on View Certificate Click Install Certificate In the Store Location group, select Local Machine Click Next and OK to confirm the UAC dialog In the next screen of the Certificate Import Wizard, change the selected option to "Place all certificates in the following store" Click Browse. In the Select Certificate Store window, scroll down and select Trusted People and click OK Click Next. A "Completing... " screen appears Click Finish (agreeing to the following confirmation dialog if displayed)

These are steps I borrowed from Microsoft, of course, but worth sharing, as they are critical to be able to do local debugging or your applications once deployed into an Appx package. Remember that file access rules and even WinRT API call rules are different for applications executed via an Appx package and the Windows Desktop Bridge, so you need to do adequate testing in this scenario.


【Delphi / C++Builder Starter チュートリアルシリーズ】 第6回 ‟ミニゲームを作ってみよう„ [JAPAN]

$
0
0

【Delphi / C++Builder Starter チュートリアルシリーズ】

第6回 ‟ミニゲームをつくってみよう„

 10月24日より始まりました 「Delphi / C++Builder Starter チュートリアルシリーズ」。全10回、12月26日まで、毎週17時より30分間で、無料でダウンロード&利用できる開発環境のDelphi / C++Builder Starter エディションを使用して、ゲームを作るまで一通り、セミナーを実施してまいります。

このブログでは第6回のサマリーと参考情報など掲載いたします。 

なお、前回および初回分の内容に関するブログ記事は以下のリンクからお読み頂けます。

<< 第5回 ‟イベントに合わせて動かしてみよう„ 
<< 第1回 ‟無料で始めよう アプリ作成„ 


[アジェンダ]


  • ランダムな結果を得る方法を知る
  • データの入れ物(変数)を知る
  • 処理の場合分け(条件分岐)を知る


[開発環境インストール]


[Delphi / C++Builder Starter チュートリアルシリーズ]  第1回 ‟無料で始めよう アプリ作成„をご参考になり、開発環境をインストールしてください。


[第6回のサンプルコードのダウンロード]

以下のURLよりzip形式でダウンロード頂けます。演習と応用すべてのコードがDelphi/C++の両方とも含まれています。


https://github.com/kazinoue/2016_StarterTutorial_S1-6/archive/master.zip


[演習1] さいころ(1~6の値を得る)アプリを作る。

1~6のランダムな値を取得するために Random(6) という処理を実行しています。これは6つの値(0, 1, 2, 3, 4, 5) の中からいずれかの値、小数点を含まない数値(整数)をランダムに返します。指定した数値自体は返されないことに注意が必要です。6 のように処理に対して与えるパラメータのことを引数と言います。なお、引数を与えずに実行した場合は 0 以上 1 未満の小数点を含む数値(実数)が返されます。 

Random の仕様については以下のページもお読みください。
http://docwiki.embarcadero.com/Libraries/ja/System.Random

また、この処理では Random の戻り値を変数に保存しています。変数はデータを一時的に保管するための入れ物です。保管するデータの種類に合わせて予め宣言しておく必要があります。演習1 の時点では変数を使う必要は無いのですが、演習2 へのつなぎのためにあえて変数を使っています。


Delphi

//
procedure TForm1.ButtonThrowDiceClick(Sender: TObject);
var
  // 変数 DiceValue の定義
  //
  // 実演では手作業で入力していたが、
  // IDE の入力支援機能を使えば手作業で入力する必要はない。
  // その変数名が登場した箇所で [ctrl] 実際には begin - end の間で
  // Ctrl + Shift + V を押すだけで自動的に変数定義が追加できる。
  DiceValue: Integer;
begin
  // Random(6) は 0, 1, 2, 3, 4, 5 の値をとるので、
  // さいころとして使うために + 1 する。
  DiceValue := Random(6) + 1;

  // Memo1 の先頭にさいころの値を差し込む。
  // DiceValue は数値型(Integer) だけど、
  // 表示の際は文字列型にする必要があるので toString を指定する。
  Memo1.Lines.Insert(0,DiceValue.toString);
end;


C++

//
void __fastcall TForm2::ButtonThrowDiceClick(TObject *Sender)
{
	// 変数 DiceValue の定義
	int DiceValue;

	// Random(6) は 0, 1, 2, 3, 4, 5 の値をとるので、
	// さいころとして使うために + 1 する。
	DiceValue = Random(6) + 1;

	// Memo1 の先頭にさいころの値を差し込む。
	// DiceValue は数値型(int) だけど、
	// 表示の際は文字列型にする必要があるので IntToStr で型変換する。
	Memo1->Lines->Insert(0,IntToStr(DiceValue));
}


[演習2] 疑似さいころ(1~6の値を得る)に条件分岐を追加する。

演習2では、さいころの値が1のときに表示内容を変える処理を実装しました。

すでに作成済みの処理に対して以下のコードを追加すると、1の目が出たときに追加のメッセージを表示させることができます。

Delphi

//
  // if文による条件分岐
  if DiceValue = 1 then
    Memo1.Lines.Insert(0,'1の目が出ました');

C++

//
	// if文による条件分岐
	// Delphiとは違い、then を記述する必要はない
	if (DiceValue == 1)
		Memo1->Lines->Insert(0,L"1の目が出ました");
}

Delphi と C++ では if文での値比較の式が若干異なることに注意してください。Delphi では値の代入用には := を使用し、値の比較に = を使用しています。これは数学の等式の書き方と類似しています。しかし C++ では代入用に = を使うルールのため、値の比較では == と書くルールです。


ただし C++ で "if DiceValue = 1" と書いても文法エラーにはなりません。この if 文は、「DiceValue の値を 1 にする」という処理が成功したかどうか、を判定する処理になっています。そしてこの処理は基本的に必ず成功しますから、成功した場合の処理だけが必ず動作することになります。


なお、上記の例では実行する処理が1つだけでしたが、複数の処理をまとめて行う場合や、条件を満たさない場合の処理を行う場合は以下のように記述できます。

Delphi

//
  // if文による条件分岐
  if DiceValue = 1 then
  begin
    処理1;
    処理2;
    処理3;
  end;

  // if文による条件分岐
  if DiceValue = 1 then
  begin
    処理1;
    処理2;
    処理3;
  end
  else
  begin
    処理4;
    処理5;
    処理6;
  end;

C++

//
  // if文による条件分岐
  if DiceValue == 1 {
    処理1;
    処理2;
    処理3;
  }

  // if文による条件分岐
  if DiceValue == 1 {
    処理1;
    処理2;
    処理3;
  }
  else
  {
    処理4;
    処理5;
    処理6;
  }

Delphi の場合は一連の処理の終わりにセミコロンをつけるルールですが、if 文の場合は条件判定がOKだった場合、NGだった場合を含めて一続きの処理ですから、if 文の最後の end にだけセミコロンが付きます。ただし begin - end の中に記述する処理では個別にセミコロンをつけます。


C++ の場合は処理のブロックの開始と終了を { と } で囲むルールです。これは Delphi の begin - end に対応していますが、これらのブロック記号に対してセミコロンをつける必要はありません。


なお、ある変数に対して値の場合分けを3つ以上作成したい場合に if 文を使うと冗長な書き方になってしまう場合があります。このような場合は case 文というものを用いると処理がシンプルに記述できることがあります。case 文については今回のセッションで紹介していませんが、次回以降で使用例が出てきます。また docwiki には以下のドキュメントがあります。

http://docwiki.embarcadero.com/RADStudio/Berlin/ja/%E5%AE%A3%E8%A8%80%E3%81%A8%E6%96%87%EF%BC%88Delphi%EF%BC%89#case_.E6.96.87

http://docwiki.embarcadero.com/RADStudio/Berlin/ja/Case


[演習3] 特定の値が出るまで繰り返す条件分岐を入れてみる。

演習2の処理ではif文による条件判定が1回だけ行われるコードでしたが「条件を満たす間は同じ処理を実行し続ける」という処理を書くこともできます。

この処理は while ループ、until ループという方法で書けます。

while (Delphi++)

//
procedure TForm1.ButtonLoopWhileClick(Sender: TObject);
var
  DiceValue: Integer;
begin
  Memo1.Lines.Insert(0,'');

  // 初回のサイコロ振り
  DiceValue := Random(6) + 1;

  // while ループは、条件を満たす間は処理を実行する。
  // 「1が出るまで繰り返す」という処理は「1が出ない間は繰り返す」と
  // 表現することができる。
  // なお、whileループは最初に継続条件の判定を行うため、
  // while の前に値が設定されていることが必要。
  // ここでは「1が出るまで = 1が出ない間」はループを続ける。
  while (DiceValue <> 1) do
  begin
    Memo1.Lines.Insert(0,DiceValue.toString + ' はずれ' );

    // ループの中でサイコロを振る処理
    DiceValue := Random(6) + 1;
  end;

  // この処理は while の後にあるので、
  // 今回の実装では while の条件が不成立となった後に
  // かならず実行される処理となる。
  Memo1.Lines.Insert(0,DiceValue.toString + ' キター');
end;

While (C++)

//
void __fastcall TForm2::ButtonLoopWhileClick(TObject *Sender)
{
	// 変数 DiceValue の定義
	int DiceValue;

	Memo1->Lines->Insert(0,L"");

	// 初回のサイコロ振り
	DiceValue = Random(6) + 1;

	// while ループは、条件を満たす間は処理を実行する。
	// 「1が出るまで繰り返す」という処理は「1が出ない間は繰り返す」と
	// 表現することができる。
	// なお、whileループは最初に継続条件の判定を行うため、
	// while の前に値が設定されていることが必要。
	// ここでは「1が出るまで = 1が出ない間」はループを続ける。

	// Delphi では <> で比較したが、C++ では != を用いる
	while (DiceValue != 1) {
		Memo1->Lines->Insert(0,IntToStr(DiceValue) + L" はずれ" );

		// ループの中でサイコロを振る処理
		DiceValue = Random(6) + 1;
	}
	// この処理は while の後にあるので、
	// 今回の実装では while の条件が不成立となった後に
	// かならず実行される処理となる。
	Memo1->Lines->Insert(0,IntToStr(DiceValue) + L" キター" );
}

Until (Delphi)

//
procedure TForm1.ButtonLoopUntilClick(Sender: TObject);
var
  DiceValue: Integer;
begin
  Memo1.Lines.Insert(0,'');

  // repeat 〜 until は「ループ処理を少なくとも1回実行し、
  // 条件が満たされるまでループを繰り返す」ように動作する。
  repeat
    // さいころを振る。
    DiceValue := Random(6) + 1;

    // while ループと同様に 'はずれ' の文字を出すためには
    // ループの中で値を検証せねばならない。
    if (DiceValue <> 6) then
      Memo1.LInes.Insert(0,DiceValue.toString + ' はずれ');

  // ここまでのループの内容を 6 の目が出るまで続ける。
  until (DiceValue = 6);

  // この処理は until の後にあるので、
  // 今回の実装では until の終了条件が満たされた後に
  // かならず実行される処理となる。
  Memo1.Lines.Insert(0,DiceValue.toString + ' キター');
end;

C++ には Until ループはありませんが、代わりに do - while という書き方ができます。

//
void __fastcall TForm2::ButtonLoopUntilClick(TObject *Sender)
{
	// 変数 DiceValue の定義
	int DiceValue;

	Memo1->Lines->Insert(0,L"");

	// C/C++ には repeat 〜 until は無く、
	// 代わりに do 〜 while という形で while ループを書く。
	// while なので記述すべき条件はループの継続条件である。
	// (repeat はループの終了条件)
	do {
		// さいころを振る。
		DiceValue = Random(6) + 1;

		// 前述の while ループと同様に 'はずれ' の文字を出すためには
		// ループの中で値を検証せねばならない。
		if (DiceValue != 6)
		  Memo1->Lines->Insert(0,IntToStr(DiceValue) + L" はずれ");

	}
	// ここまでのループの内容を 6 の目が出るまで続ける。
	while (DiceValue != 6);

	// Delphi の repeat と同じロジックで判定式を書きたい場合は
	// 以下のように判定式全体に ! をつければよい(あまり意味がないが)
	// while ( !(DiceValue == 6) );


	// この処理は until の後にあるので、
	// 今回の実装では until の終了条件が満たされた後に
	// かならず実行される処理となる。
	Memo1->Lines->Insert(0,IntToStr(DiceValue) + L" キター" );
}


なお、while, until ともに条件判定を行いながら繰り返す処理ですが、もっと単純なループ(変数の値を所定の範囲で変えながら繰り返す)には for という処理を用います。for ループはここでは紹介しませんが、docwiki のURLを例示します。

http://docwiki.embarcadero.com/RADStudio/Berlin/ja/%E5%AE%A3%E8%A8%80%E3%81%A8%E6%96%87%EF%BC%88Delphi%EF%BC%89#for_.E6.96.87

http://docwiki.embarcadero.com/RADStudio/Berlin/ja/For%EF%BC%88C%2B%2B%EF%BC%89


[応用] ミニゲームを作る。

ここまでの内容でご説明した機能を組み合わせることで、ちょっとしたゲームを作ることができます。チュートリアルセッションでは「表示された数と同じ数を選ぶ早押しゲーム」的なものをご紹介しました。

このゲームで取り扱うイベントはたった2つだけです。いままでの演習に比べるとコード量は若干増えていますが、理解するのが難しい処理は無いと思います。

このゲームのサンプルコードは、先にご案内したURLからダウンロードしたアーカイブ内の MiniGme フォルダにありますので、これを実際に開いて動かしながら中身を読んで頂くのがよいかと思います。


■次回は12月5日(月)17:00より  “シューティングゲーム キャラクターを貼り付けよう そして動かそう„

 をお送りします。ここからは3週間にわたってシューティングゲーム作りを進めていきます。 

それでは、また来週!

<< 第5回 ‟イベントに合わせて動かしてみよう„ 

>> 第7回 “シューティングゲーム キャラクターを貼り付けよう そして動かそう„


New VCL Calendar Controls in Berlin Anniversary Edition

$
0
0

The new VCL calendar controls in RAD Studio Berlin Update 2 Anniversary Edition mimic WinRT UI controls while providing support for older versions of Windows.


[YoutubeButton url='https://www.youtube.com/watch?v=sxsRqTJcmKo']


Get More. Do More. Spend Less.

To celebrate the launch of 10.1 Berlin Update 2 - Anniversary Edition, take advantage of our time limited offer:

10% off Professional, 15% off Enterprise and 20% off Architect.

Offer ends November 30, 2016.


Changing the color scheme of an Android style

$
0
0

Following up on my recent blog post and CodeRage session on creating custom style elements, I thought I would do another post on custom styling, this time focusing on changing the overall color scheme for one of the style templates we provide without creating new style elements from scratch.

Neue Webinare: Delphi 10.1 Berlin, Anniversary Update 2 / Migration auf 10.1 Berlin / RAD Server

$
0
0

Am 6./8. und 13. Dezember werde ich drei Webinare durchführen:


Webinar: Neues in Delphi 10.1 Berlin Update 2

Delphi 10.1 Berlin Update 2 bietet eine Vielzahl von Neuerungen. Neben den Verbesserungen unter der Haube auch einige nützliche Funktionen:

  • Quick-Edits
  • Neue VCL Kalender-Komponente
  • Neue Windows 10 Stile
  • Bereitstellung for den Windows 10 Store

Dieses Webinar zeigt die Neuerungen vom Update 2 für Delphi 10.1 Berlin

Dienstag, 6. Dezember 2016, 10:00 Uhr MESZ

45 Minuten + 15 Minuten Fragen und Antworten

JETZT ANMELDEN


Webinar: Migration auf Delphi 10.1 Berlin

Delphi 10.1 Berlin bietet Unterstützung für Windows 10, moderne Kommunikations- und Integrationsmöglichkeiten (Cloud, REST, Datenbanken) und eine Vielzahl von Produktivitätsneuerungen für die IDE. 

Grund genug auf Delphi 10.1 Berlin zu wechseln. 

Dieses Webinar zeigt, worauf Sie bei einer Migration von alten Delphi Version zu Delphi 10.1 Berlin achten müssen:

  • Unicode (Delphi 2007 und älter) 
  • Windows 7/8.x/10 
  • Datenbankzugriff 
  • Schnittstellen zu anderen Systemen 
  • Neuerungen in der RTL/VCL 
  • Neuerungen in der IDE

Donnerstag, 8. Dezember 2016, 10:00 Uhr MESZ

45 Minuten + 15 Minuten Fragen und Antworten

JETZT ANMELDEN


Webinar: RAD Server mit Delphi 10.1

Sie möchten Datenbanken und Funktionen Ihren Apps und Ihren Anwendungen zur Verfügung stellen? Mit dem RAD Server haben Sie die Möglichkeit dies zentral, inklusive Benutzerverwaltung und Auswertungsmöglichkeiten durchzuführen. 

Dieser Webinar zeigt die Möglichkeiten vom RAD Server beim Einsatz als Middleware für Desktop-Anwendungen und mobile Apps. Auch ein Vergleich zu DataSnap und EMS wird aufgezeigt.

Dienstag, 13. Dezember 2016, 10:00 Uhr MESZ

45 Minuten + 15 Minuten Fragen und Antworten

JETZT ANMELDEN


今週より 第33回デベロッパーキャンプ [JAPAN]

$
0
0

いよいよ 今週金曜日 12月9日に東京で、来週 火曜日12月13日に大阪で、第33回エンバカデロ デベロッパーキャンプを開催いたします。

いつものとおり、多くの講師の方々のプロフェッショナルかつテクニカルな内容をはじめ、開発実例&ケーススタディなどを、会場で目の当たりにしてご聴講いただけます。 新環境への移行にまつわる技術的内容や、iOS/Androidモバイルアプリ、RAD Studioによるサーバーサイドの開発&活用など、ためになるセッションが目白押しです。

今回の第33回デベロッパーキャンプでは、これからプログラミングを開始しようとする方々に対してのチュートリアルセッションも実施。無料で使えるDelphi / C++Builder 10.1 Berlin Starter Edition で、初めてのプログラミングを学ぶ方をサポートします。

東京会場では VRソフト・BIMソリューション・土木設計ソフトや構造解析土木設計ソフトの取り扱いをなされているフォーラムエイト様による展示も予定されています。

大阪会場だけのセッションとして、西尾レントオール株式会社 情報システム室 室長の辻野東亜様より「利用シーンに最適な建機レンタルシステムの構築」をお話しいただき、またエンバカデロより、REST/JSONを使ったモバイルアプリからサーバーへの問い合わせ実装のセッションを用意しています。

そして、エンバカデロによるジェネラルセッションでは、

【Delphi / C++Builder Starter チュートリアルシリーズ】 第7回 ‟シューティングゲーム キャラクターを貼り付けよう そして動かそう„ [JAPAN]

$
0
0

【Delphi / C++Builder Starter チュートリアルシリーズ】


第7回 ‟シューティングゲーム キャラクターを貼り付けよう そして動かそう

10月24日より始まりました 「Delphi / C++Builder Starter チュートリアルシリーズ」。全10回、12月26日まで、毎週17時より30分間で、無料でダウンロード&利用できる開発環境のDelphi / C++Builder Starter エディションを使用して、ゲームを作るまで一通り、セミナーを実施してまいります。


なお、前回および初回分の内容に関するブログ記事は以下のリンクからお読み頂けます。

<< 第6回 ‟ミニゲームを作ってみよう„ 

<< 第1回 ‟無料で始めよう アプリ作成„ 


 [アジェンダ]

  • アニメーションイベントを使う
  • TRectangleを使う
  • 描画順番を知る


[開発環境インストール]

[Delphi / C++Builder Starter チュートリアルシリーズ]  第1回 ‟無料で始めよう アプリ作成„をご参考になり、開発環境をインストールしてください。 

[今回の仕様]


  1. 背景横スクロール
  2. 戦闘機は上下移動
  3. ミサイル発射

全ての動きはTFloatAnimationを使います

[シューティングゲーム用ドット絵フリー素材] 

http://mfstg.web.fc2.com/material/index.html 
上記サイトの画像を使わせて頂きました。(ありがとうございます)

[画面構成]

  • TButton 4つ (プレーヤー操作用)
  • TRectangle 


TRectangleを画像を貼り付けながら配置していきます

上記例は背景(宇宙)の画像です。
プレーヤー戦闘機とミサイルも同じ方法で画像を貼り付けていきます。

各TRectangleのサイズと設定

Rectangle_background1

  • Size.Width = 1280
  • Size.Height = 480

Rectangle_background2

  • Position.X = 640
  • Size.Width = 1280
  • Size.Height = 480

Rectangle_player

  • Position.X = 100
  • Position.Y = 200
  • Size.Width = 110
  • Size.Height = 55

Rectangle_missile

  • Position.X = 296
  • Position.Y = 216
  • Size.Width = 179
  • Size.Height = 33

[背景(宇宙)アニメーションで横スクロール]


TRectangleプロパティのPosition.Xでドロップダウンリストが出ます

「TFloatAnimationの新規作成 」を選択すると 

上のようにTRectangleの下にぶら下がってる感じになり


TFloatAnimationのPropertyNameが設定されてる事が確認できていると思います

背景1, 背景2, プレーヤー戦闘機、ミサイル 全てに同じようにTFloatAnimationを作っていきます
(戦闘機はPosition.X, Position.Y両方にTFloatAnimationを作ります)


[FloatAnimation_background1,2 OnFinishイベント追加]


オブジェクトインスペクタからTFloatAnimationイベントを選択しOnFinishの部分にマウスでダブルクリックしますと
イベントハンドラ画面が出てまいります。そこにコードを埋めます

背景1のDelphiコード

////
procedure TfmShooting_main.FloatAnimation_background1Finish(Sender: TObject);
begin
  case Round(Rectangle_background1.Position.X) of
    0: begin
      FloatAnimation_background1.StartValue := 0;
      FloatAnimation_background1.StopValue  := -Self.Width;
    end;
    else
    begin
      FloatAnimation_background1.StartValue := Self.Width;
      FloatAnimation_background1.StopValue  := 0;
    end;
  end;
  FloatAnimation_background1.Start;
end;

背景1のC++コード

////
void __fastcall TfmShooting_main::FloatAnimation_background1Finish(TObject *Sender)

{
	int x_{(int)System::Math::RoundTo(Rectangle_background1->Position->X, 0)};
	switch (x_){
	case 0:
		FloatAnimation_background1->StartValue = 0;
		FloatAnimation_background1->StopValue  = -this->Width;
		break;
	default:
		FloatAnimation_background1->StartValue = this->Width;
		FloatAnimation_background1->StopValue  = 0;
		;
	}
	FloatAnimation_background1->Start();
}


背景2のコード

////
procedure TfmShooting_main.FloatAnimation_background2Finish(Sender: TObject);
begin
  case Round(Rectangle_background2.Position.X) of
    0: begin
      FloatAnimation_background2.StartValue := 0;
      FloatAnimation_background2.StopValue  := -Self.Width;
    end;
    else
    begin
      FloatAnimation_background2.StartValue := Self.Width;
      FloatAnimation_background2.StopValue  := 0;
    end;
  end;
  FloatAnimation_background2.Start;
end;

背景2のC++コード

////
void __fastcall TfmShooting_main::FloatAnimation_background2Finish(TObject *Sender)

{
	int x_{(int)System::Math::RoundTo(Rectangle_background2->Position->X, 0)};
	switch (x_){
	case 0:
		FloatAnimation_background2->StartValue = 0;
		FloatAnimation_background2->StopValue  = -this->Width;
		break;
	default:
		FloatAnimation_background2->StartValue = this->Width;
		FloatAnimation_background2->StopValue  = 0;
		;
	}
	FloatAnimation_background2->Start();
}

[Player 戦闘機操作用 ボタン]

Upボタン

  • Anchors = [akLeft, akBottom]
  • Position.X = 5
  • Position.Y = 344
  • Size.Width = 80
  • Size.Height = 50
  • Text = '▲'

Downボタン

  • Anchors = [akLeft, akBottom]
  • Position.X = 5
  • Position.Y = 408
  • Size.Width = 80
  • Size.Height = 50
  • Text = '▼'

ミサイルボタン

  • Anchors = [akRight, akBottom]
  • Position.X = 552
  • Position.Y = 400
  • Size.Width = 80
  • Size.Height = 50
  • Text = '■'


[戦闘機TFloatAnimation Position.Y側 に コードを追加]

Delphi

////
procedure TfmShooting_main.FloatAnimation_player_xFinish(Sender: TObject);
begin
  Button_missile.Visible  := True;
  Button_up.Visible       := True;
  Button_down.Visible     := True;
end;

C++

[ミサイルTFloatAnimation Position.Y側 に コードを追加]

Delphi

////
procedure TfmShooting_main.FloatAnimation_missileFinish(Sender: TObject);
begin
  Button_missile.Enabled    := True;
  Rectangle_missile.Visible := False;
end;


[プレーヤ戦闘機操作ボタンイベント]

Upボタン

Delphi

////
procedure TfmShooting_main.Button_upClick(Sender: TObject);
begin
  FloatAnimation_player_y.StartValue  := Rectangle_player.Position.Y;
  if Rectangle_player.Position.Y - 50 > 0 then
  begin
    FloatAnimation_player_y.StopValue   := Rectangle_player.Position.Y - 50;
  end
  else
  begin
    FloatAnimation_player_y.StopValue   := 0;
  end;

  FloatAnimation_player_y.Start;
end;

C++

////
void __fastcall TfmShooting_main::Button_upClick(TObject *Sender)
{
	FloatAnimation_player_y->StartValue = Rectangle_player->Position->Y;
	if ( Rectangle_player->Position->Y - 50 > 0){
		FloatAnimation_player_y->StopValue = Rectangle_player->Position->Y - 50;
	}
	else
	{
		FloatAnimation_player_y->StopValue = 0;
	}
	FloatAnimation_player_y->Start();
}


Downボタン

Delphi

////
procedure TfmShooting_main.Button_downClick(Sender: TObject);
begin
  FloatAnimation_player_y.StartValue  := Rectangle_player.Position.Y;
  if Rectangle_player.Position.Y +50 < (Self.Height- Rectangle_player.Height -50) then
  begin
    FloatAnimation_player_y.StopValue   := Rectangle_player.Position.Y + 50;
  end
  else
  begin
    FloatAnimation_player_y.StopValue   := Self.Height- Rectangle_player.Height -50;
  end;

  FloatAnimation_player_y.Start;
end;

C++

////
void __fastcall TfmShooting_main::Button_downClick(TObject *Sender)
{
	FloatAnimation_player_y->StartValue	= Rectangle_player->Position->Y;
	if ((Rectangle_player->Position->Y +50) < (this->Height- Rectangle_player->Height -50)){
		FloatAnimation_player_y->StopValue = Rectangle_player->Position->Y + 50;
	}
	else{
		FloatAnimation_player_y->StopValue = this->Height- Rectangle_player->Height -50;
	}
  FloatAnimation_player_y->Start();

}


ミサイルボタン

Delphi

  //http://mfstg.web.fc2.com/material/index.html
procedure TfmShooting_main.Button_missileClick(Sender: TObject);
begin
  Button_missile.Enabled            := False;
  FloatAnimation_missile.StartValue := Rectangle_player.Position.X + 20;
  Rectangle_missile.Position.Y      := Rectangle_player.Position.Y + 25;
  Rectangle_missile.Visible := True;
  FloatAnimation_missile.Start;
end;

C++

////
void __fastcall TfmShooting_main::Button_missileClick(TObject *Sender)
{
	Button_missile->Enabled				= false;
	FloatAnimation_missile->StartValue 	= Rectangle_player->Position->X + 20;
	Rectangle_missile->Position->Y     	= Rectangle_player->Position->Y + 25;
	Rectangle_missile->Visible 			= true;
	FloatAnimation_missile->Start();
}


[スタート画面]


[スタートボタンイベントを作る]

Delphi


////
procedure TfmShooting_main.Button_startClick(Sender: TObject);
begin
  Rectangle_player.Visible      := True;
  Rectangle_startscene.Visible  := False;
  FloatAnimation_player_x.Start;
end;

C++


void __fastcall TfmShooting_main::Button_startClick(TObject *Sender)
{
  Rectangle_player->Visible      	= true;
  Rectangle_startscene->Visible		= false;
  FloatAnimation_player_x->Start();
}


[プレーヤー戦闘機 登場アニメーション]

これも同じくOnFinishイベントにコードを追加します

Delphi

////
procedure TfmShooting_main.FloatAnimation_player_xFinish(Sender: TObject);
begin
  Button_missile.Visible  := True;
  Button_up.Visible       := True;
  Button_down.Visible     := True;
end;


C++

///
void __fastcall TfmShooting_main::FloatAnimation_player_xFinish(TObject *Sender)
{
	Button_missile->Visible	= true;
	Button_up->Visible		= true;
	Button_down->Visible	= true;
}


[githubにソースを公開しております]

https://github.com/mojeld/embarcadero_jp_shooting_game


■次回は12月12日(月)17:00より  “シューティングゲーム 敵を動かしてみよう„ をお送りします。


<< 第6回 ‟ミニゲームを作ってみよう„ 

Speaking at SDN Event, December 9th, in the Netherlands

$
0
0

Bob Swart, who coordinates the Delphi events for SDN, invited myself and Andrea Magni (all Italian crew) to talk at the SDN Event next Friday, December 9th. I'll be giving a keynote on the status of Delphi, a session on Windows 10 and the Centennial Bridge, and one on my experience publishing mobile applications. Andrea is talking about this FireMonkey and REST open source libraries.

More information at https://www.sdn.nl/EVENTS/9-december-2016

​I won't be around much, traveling only for the event, feel free to stop by and have a chat.

第33回デベロッパーキャンプ 【T5】RAD Server活用ショーケース: IoTを活用してデータを集積 [JAPAN]

$
0
0

いよいよ間近に迫ってきた第33回デベロッパーキャンプ、本日は12/8の水曜日ですから、もうすぐですね。私は2つのセッションを担当しますが、今日はそのうちの T5 セッションについてご紹介します。

メインのセッションは「T5 RAD Server活用ショーケース: IoTを活用してデータを集積」です。このセッションでは、BeaconFence が測位した位置情報をバックエンドのデータベースと連携させてデータ収集する仕組みを RAD Server を用いて実装するお話をさせていただきます。

RAD Server は REST API を Delphi/C++Builder を用いて構築できるフレームワークです。Web API 側とクライアント側で同じ設計やコードを利用できることや、DataSnapとは違ってユーザー認証用の暗号化データベースと認証APIが標準で含まれていますので、開発の効率化が図れます。


残席は少なくなっていますが今からでもお申込みは可能ですので、ご興味がございましたら是非ご参加ください。ご参加頂いた方にはアンケートと引き換えで参加特典もご用意しております!


http://forms.embarcadero.com/developer-camp-overview


Less is More - Why Less Major Releases with Non-Breaking Updates Adding Features is a Good Thing

$
0
0

Answering to pressing requests from customers and partners, RAD Studio is moving this year from a 6 month release cycle with one main bug-fix update to a 1-year release cycle with multiple updates including fixes and new features. 

As we announced in our last published roadmap, https://community.embarcadero.com/article/news/16418-product-roadmap-august-2016, we are significantly slowing down the release cycle, going back to a more or less yearly major release for the product, from the faster cycle of recent years. There are many reasons for this change, but it mostly addresses complaints from customers (and tech partners, and component vendors).

The original requirement to release more often was driven by the fast-paced change in mobile operating system, compared to the Windows world -- which is actually now moving much faster under Windows 10, but that's a separate story. This requirement still applies, but it can be fulfilled in a different way.

This change in delivery cycle and model, in fact, is tied to another change, namely the fact that update subscription is now compulsory. I know you might not see the connection, but this gives us freedom to release new features and support new versions of operating system in updates, with no negative effect to the business financials. The only caveat, of course is maintaining the largest degree of binary compatibility with existing DCU files and packages. This might not be doable for a new operating system, but it is certainly doable for VCL and Windows, which is the platform the largest projects from our customers are on.

Berlin Update 1 was borderline, with some new features like native iOS grid added to the product, but most of the focus on fixing bugs. Berlin Update 2 has been the first this release in this new direction, with new VCL controls, new IDE designers, support for Desktop Bridge, and more.

It is true that delivering the same amount of features in a non-breaking update will require us some extra work, and in some cases (like Delphi language changes) it won't even be doable. So we might have to delay some features, because of the technical limitations due of non-breaking updates. But we feel the benefit of a slower release cycle to the stability of RAD Studio and of our customer projects, and hope this will allow more customers to stay and migrate on the latest version sooner -- with a good benefit in terms of their experience.

Needless to say your feedback is critical -- and even more because this was mostly driven by customer feedback. Do you still feel the product can move in the right direction with this model? Do you feel your update subscription remains relevant? Will you be able to safe time and money while keeping up to date with RAD Studio? Or will you upgrade your projects every 2 or 3 years no matter what? Let us know.

Android with RAD Studio

$
0
0

I’d like to introduce you to Android development using RAD Studio.

In this webinar session, I cover the installation of RAD Studio and some basic code examples from Hello World, to consuming a REST service. The examples are not pretty, they are very minimal for the sake of study. This video does not even scratch the surface of what is possible with RAD Studio for Android, let alone RAD Studio for cross platform, but I hope it will help you to get started writing Android applications.

This video is best viewed full screen at 1080p


[Source code to be uploaded, please check back later]

【Delphi / C++Builder Starter チュートリアルシリーズ】 第8回 ‟シューティングゲーム 敵を動かしてみよう„ [JAPAN]

$
0
0

【Delphi / C++Builder Starter チュートリアルシリーズ】


第8回 ‟シューティングゲーム 敵を動かしてみよう

10月24日より始まりました 「Delphi / C++Builder Starter チュートリアルシリーズ」。全10回、12月26日まで、毎週17時より30分間で、無料でダウンロード&利用できる開発環境のDelphi / C++Builder Starter エディションを使用して、ゲームを作るまで一通り、セミナーを実施してまいります。


なお、前回および初回分の内容に関するブログ記事は以下のリンクからお読み頂けます。

<< 第7回 ‟シューティングゲーム キャラクターを貼り付けよう そして動かそう„ 

<< 第1回 ‟無料で始めよう アプリ作成„ 


[アジェンダ]

  • TBitmapAnimationで敵を動かす
  • TTimerとRandom()を 使い敵を出現


[開発環境インストール]


[Delphi / C++Builder Starter チュートリアルシリーズ]  第1回 ‟無料で始めよう アプリ作成„をご参考になり、開発環境をインストールしてください。 


[今回の仕様]

前回(第7回)ではプレーヤー(戦闘機)の上下移動と戦闘機から発射されるミサイル攻撃までをプログラミングしてきました。

今回は敵が出てきます。敵が出現し敵からレーザービーム発射される部分を作ります。


 [敵]

←的です

敵も前回と同じくTRectangleを使って、前回と同じようにFill.Bitmapに敵の画像を設定していきます

ここで新しくTBitmapAnimationが出てきます

  • Enabled = アニメーション開始
  • Duration = 開始値から終了値までの、アニメーションする時間(秒数)。
  • Loop =アニメーションを無制限に繰り返します。
  • StartValue =ビットマップ イメージから開始します。
  • StopValue =このビットマップ イメージに到達した際に、停止します。


[敵出現(動かす)]

敵は合計3つです。これを使いまわします。

出現の動きは全て1秒タイマーイベントでランダムに敵アニメーションを実行します

敵TRectangleのPosition.X(横軸)にTFloatAnimationを設定します。

TFloatAnimation設定方法は前回と同じです

1秒間のタイマーイベントでランダムに敵のTFloatAnimationをスタートさせます。

TTimerを使いInterval=1000とします。OnTimerで下記のように実装します


[TTimer OnTimer]

Delphi

////
procedure TfmShooting_main.Timer_EnmsTimer(Sender: TObject);
var
  iEnm:   Integer;  //乱数0~4敵番号を決定する変数
  iEnm_y: Integer;  //乱数敵Position.Yを決定する変数
  procedure enm_start(enm: TRectangle; ani: TFloatAnimation; bani: TBitmapAnimation);
  begin
    if not enm.Visible then             {敵が待機している場合}
    begin
      enm.Position.Y  := iEnm_y;        {敵のY座標を決定}
      enm.Visible     := True;          {敵を表示}
      ani.StartValue  := Width + 10;
      ani.StopValue   := -enm.Width -10;
      ani.Start;                        {Position.Xを左に移動開始}
      bani.Start;                       {敵ビットマップアニメ開始}
    end;
  end;
begin
  iEnm    := Random(5);                 {0~4決定}
  iEnm_y  := Random(Self.Height - 100); {Positon.Y決定}
  case iEnm of
    1:enm_start(Rectangle_Enm1, FloatAnimation_Enm1, BitmapAnimation_Enm1);
    2:enm_start(Rectangle_Enm2, FloatAnimation_Enm2, BitmapAnimation_Enm2);
    3:enm_start(Rectangle_Enm3, FloatAnimation_Enm3, BitmapAnimation_Enm3);
  end;
end;

C++Builderコード

////
void __fastcall TfmShooting_main::enm_start(TRectangle* enm, TFloatAnimation* ani, TBitmapAnimation* bani)
{
	std::uniform_int_distribution<int> enm_position( 0, this->Height-100 ) ;
	unsigned int iEnm_y = enm_position(randomize_); //
	if (! enm->Visible) {
		enm->Position->Y    = iEnm_y;
		enm->Visible        = true;
		ani->StartValue     = this->Width + 10;
		ani->StopValue      = -enm->Width - 10;
		ani->Start();
		bani->Start();
	}
}

void __fastcall TfmShooting_main::Timer_EnmsTimer(TObject *Sender)
{
	std::uniform_int_distribution<int> enm_num( 0, 4 ) ;
	unsigned int iEnm = enm_num(randomize_);
	switch(iEnm){
	case 1: enm_start(Rectangle_Enm1, FloatAnimation_Enm1, BitmapAnimation_Enm1);
        break;
	case 2: enm_start(Rectangle_Enm2, FloatAnimation_Enm2, BitmapAnimation_Enm2);
		break;
	case 3: enm_start(Rectangle_Enm3, FloatAnimation_Enm3, BitmapAnimation_Enm3);
	}
}


[敵のTFloatAnimation OnFinish]

Delphiコード

////
procedure TfmShooting_main.FloatAnimation_Enm1Finish(Sender: TObject);
begin
  Rectangle_Enm1.Visible  := False; {画面からフレームアウト後 敵1を非表示}
end;

procedure TfmShooting_main.FloatAnimation_Enm2Finish(Sender: TObject);
begin
  Rectangle_Enm2.Visible  := False; {画面からフレームアウト後 敵2を非表示}
end;

procedure TfmShooting_main.FloatAnimation_Enm3Finish(Sender: TObject);
begin
  Rectangle_Enm3.Visible  := False; {画面からフレームアウト後 敵3を非表示}
end;

C++Builderコード

////
void __fastcall TfmShooting_main::FloatAnimation_Enm1Finish(TObject *Sender)
{
	Rectangle_Enm1->Visible = false;	//画面からフレームアウト後 敵1を非表示
}
//---------------------------------------------------------------------------

void __fastcall TfmShooting_main::FloatAnimation_Enm2Finish(TObject *Sender)
{
	Rectangle_Enm2->Visible = false;    //画面からフレームアウト後 敵2を非表示
}
//---------------------------------------------------------------------------

void __fastcall TfmShooting_main::FloatAnimation_Enm3Finish(TObject *Sender)
{
	Rectangle_Enm3->Visible = false;    //画面からフレームアウト後 敵3を非表示
}
//---------------------------------------------------------------------------

void __fastcall TfmShooting_main::FloatAnimation_player_yFinish(TObject *Sender)
{
    Button_missile->Enabled = true;
}


[敵が攻撃]

敵から出力されるレーザービーム攻撃を作ります


レーザービームもTRectangleとPosition.XはTFloatAnimationです

TFloatAnimationのDurationは1.2秒にします。

 レーザービーム攻撃開始するための新しいタイマーを作ります

TTimerを使いこれもInterval=1000でTimer_Enms_laserbeamとしました。


[TTimer OnTimer]

Delphiコード

////procedure TfmShooting_main.Timer_Enms_laserbeam_Timer(Sender: TObject);
var
  iEnm: Integer;  //乱数0~4敵番号を決定する変数
  procedure MissileStat(enm: TRectangle);
  begin
    if (not Rectangle_Enm_laserbeam.Visible) and enm.Visible then
    begin
      Rectangle_Enm_laserbeam.Position.Y      := enm.Position.Y + 25;
      Rectangle_Enm_laserbeam.Visible         := True;
      FloatAnimation_Enm_laserbeam.StartValue := enm.Position.X - 20;
      FloatAnimation_Enm_laserbeam.StopValue  := FloatAnimation_Enm_laserbeam.StartValue - (Self.Width + 50);
      FloatAnimation_Enm_laserbeam.Start;
    end;
  end;
begin
  iEnm  := Random(5); //乱数0~4決定
  case iEnm of
  1:MissileStat(Rectangle_Enm1);
  2:MissileStat(Rectangle_Enm2);
  3:MissileStat(Rectangle_Enm3);
  end;
end;

C++Builderコード

void __fastcall TfmShooting_main::EnmlaserbeamStat(TRectangle* enm)
{
	if (!(Rectangle_Enm_laserbeam->Visible) && enm->Visible) {
		Rectangle_Enm_laserbeam->Position->Y  		= enm->Position->Y + 25;
		Rectangle_Enm_laserbeam->Visible      		= true;
		FloatAnimation_Enm_laserbeam->StartValue	= enm->Position->X -20;
		FloatAnimation_Enm_laserbeam->StopValue		= FloatAnimation_Enm_laserbeam->StartValue - (this->Width + 50);
		FloatAnimation_Enm_laserbeam->Start();
	}
}

void __fastcall TfmShooting_main::Timer_Enms_laserbeamTimer(TObject *Sender)
{
	std::uniform_int_distribution<int> enm_num( 0, 3 ) ;
	unsigned int iEnm = enm_num(randomize_);
	switch(iEnm){
	case 1:EnmlaserbeamStat(Rectangle_Enm1);
		break;
	case 2:EnmlaserbeamStat(Rectangle_Enm2);
		break;
	case 3:EnmlaserbeamStat(Rectangle_Enm3);
	}
}

 [レーザービーム TFloatAnimation OnFinish]

Delphiコード

////
procedure TfmShooting_main.FloatAnimation_Enm_laserbeamFinish(Sender: TObject);
begin
  {画面からフレームアウト後 レーザービーム1を非表示}
  Rectangle_Enm_laserbeam.Visible := False;
end;

C++Builderコード

////
void __fastcall TfmShooting_main::FloatAnimation_Enm_laserbeamFinish(TObject *Sender)

{
	Rectangle_Enm_laserbeam->Visible	= false;
}


[githubにソースを公開しております]

https://github.com/mojeld/embarcadero_jp_shooting_game


■次回は12月19日(月)17:00より  “シューティングゲーム 敵を攻撃しよう„ をお送りします。


<< 第7回 ‟シューティングゲーム キャラクターを貼り付けよう そして動かそう„  


Webcast: What’s coming for big data in 2017?

$
0
0

Webcast: What’s coming for big data in 2017?

Time: Tuesday, December 13, 2016 10:00am PT

Speakers:

Jeff Pohlmann, VP of Big Data and Analytics Platform, Oracle Peter Jeffcock, Director of Big Data Product Marketing, Oracle


This webcast deep dive into the major trends of 2017 and will showcase a range of big data themes that companies will need to address to enable for success in the years to come.  New technologies are enabling long-desired applications, with Kafka supporting simpler data-bus architectures for Real-Time data analytics, and data virtualization giving analysts access to data across storage platforms and language barriers.  These changes will have a significant impact on how companies can operate and gain their competitive advantage.

This webcast will shed the light on:

Trends in data architecture Bleeding-edge applications of data What you can do now to prepare your organization for what’s to come

Click here for more details and to register!


InterBase on Linux

$
0
0

Following Jim McKeeth’s recent Embarcadero community post about preparing for Delphi for Linux, I wanted to add a few notes about how you can use Linux today as part of your server architecture; and also point out how to get ready for Linux by using InterBase.

InterBase on Linux

InterBase Server is available for both Windows 32bit and 64bit along with Linux 32bit and 64bit Servers.  For Linux, InterBase is certified for a number of distributions including

RHEL 7 RHEL 6 SuSE 11.3 Ubuntu 14

You can keep up with the latest supported platforms at www.embarcadero.com/products/interbase/supported-platforms 

Getting Started – InterBase in Linux

Gabe Goldfield, posted a really useful article last year about installing and getting started with InterBase on Linux.

InterBase – Portable Database format

Because InterBase uses the same On Disk Structure (ODS) you can do your development on Windows along side your favourite IDE (Visual Studio, Eclipse, RAD Studio, Delphi, C++Builder etc) and then copy your application database directly onto a linux machine ready for use.

InterBase – Deeply Embedded on Linux

InterBase ToGo is not currently supported on Linux, however the recent InterBase roadmap includes mention of InterBase ToGo being made available for the Linux Platform in the near future. This will ensure InterBase can be deployed embedded with your application for smaller application usage, as well via the traditional Server Installer for larger scale deployment mentioned above.

More on InterBase

For more on InterBase, make sure you check out

www.embarcadero.com/products/interbase twitter.com/interbase  docwiki.embarcadero.com

The post InterBase on Linux appeared first on Stephen Ball's Technical Blog.

【Delphi / C++Builder Starter チュートリアルシリーズ】 第9回 ‟シューティングゲーム 敵を攻撃しよう„ [JAPAN]

$
0
0

【Delphi / C++Builder Starter チュートリアルシリーズ】

第9回 ‟シューティングゲーム 敵を攻撃しよう

10月24日より始まりました 「Delphi / C++Builder Starter チュートリアルシリーズ」。全10回、12月26日まで、毎週17時より30分間で、無料でダウンロード&利用できる開発環境のDelphi / C++Builder Starter エディションを使用して、ゲームを作るまで一通り、セミナーを実施してまいります。


なお、前回および初回分の内容に関するブログ記事は以下のリンクからお読み頂けます。

<< 第8回 ‟シューティングゲーム 敵を動かしてみよう„  

<< 第1回 ‟無料で始めよう アプリ作成„ 


[アジェンダ]

  • アニメーション終了時の物体判定
  • タイマーを使った物体判定


[開発環境インストール] 

[Delphi / C++Builder Starter チュートリアルシリーズ]  第1回 ‟無料で始めよう アプリ作成„をご参考になり、開発環境をインストールしてください。 


 [シューティングゲーム用ドット絵フリー素材] 

http://mfstg.web.fc2.com/material/index.html 
上記サイトの画像を使わせて頂きました。(ありがとうございます)


[今回の仕様]


ミサイル攻撃判定(プレーヤが敵を攻撃)

物体が重なり判定(敵からの攻撃に当たる

[プレーヤが敵を攻撃]

敵はX=0方向に向かって避ける事なくまっすぐ突進してきます。

なので戦闘機のミサイル発射ボタンクリックされた段階でどの敵に当たるのか判断できます。

ミサイル攻撃ボタンOnClickイベント時に敵が前方に存在するか判断するコードを記述します


Delphi

////
procedure TfmShooting_main.Button_missileClick(Sender: TObject);
var
  iExPos:   Single;     //プレーヤーミサイル最終Position.X
  iTemp:    Single;     //一旦保存用
  iEnmX:    Single;     //敵Position.X一旦保存用
  i:        Integer;    //ループ用
  em_buf_:  TRectangle; //敵一旦保存
  function EnmExist(enm: TRectangle): Single;
  begin         {敵が目的の座標に居た場合敵のPosition.Xを返す}
    Result  := missile_max;
    if enm.Visible and (enm.Position.X > (Rectangle_player.Position.X + Rectangle_player.Width)) then
      if ((enm.Position.Y-10) <= Rectangle_missile.Position.Y) and
        ((enm.Position.Y + (enm.Height*enm.Scale.X))+10 >= Rectangle_missile.Position.Y) then
      begin
        Result      := enm.Position.X;
      end;
  end;
begin
  Button_missile.Enabled            := False;       //ミサイルボタンを無効
  KanokeBuff                        := nil;         //敵保存変数をクリア
  FloatAnimation_missile.StopValue  := missile_max; //ミサイル最終地点設定
  Rectangle_missile.Position.Y      := Rectangle_player.Position.Y + 25;
  FloatAnimation_missile.StartValue := Rectangle_player.Position.X + 20;
  iExPos  := missile_max;
  iEnmX   := missile_max;
  for i := 0 to 2 do  {ループで敵3つを順番に撃破可能か調べる}
  begin
    case i of
    0:em_buf_ := Rectangle_Enm1;
    1:em_buf_ := Rectangle_Enm2;
    2:em_buf_ := Rectangle_Enm3;
    end;
    iTemp   := EnmExist(em_buf_);
    if (iTemp < missile_max) and (iEnmX > em_buf_.Position.X)  then
    begin   {敵の前に敵が居る場合, 手前の敵を優先}
      iExPos      := iTemp;
      KanokeBuff  := em_buf_;
    end;
    if Assigned(KanokeBuff) then  {撃破出来る敵変数に存在するか確認}
      iEnmX := KanokeBuff.Position.X;
  end;

  if iExPos < (Rectangle_player.Position.X + Rectangle_player.Width) then
    iExPos := missile_max;  {敵がプレーヤーより後ろにいる場合標的から外す}

  FloatAnimation_missile.StopValue  := iExPos;  {ミサイルの目標値をセット}

  Rectangle_missile.Visible := True;            {ミサイルを表示}
  FloatAnimation_missile.Start;                 {ミサイル発射}
end;


C++

////
float 	__fastcall TfmShooting_main::EnmExist(TRectangle* enm)
{
	float f_missile_max{static_cast<float>(missile_max)};
	float result_ = f_missile_max;

	if (enm->Visible && (enm->Position->X >
		(Rectangle_player->Position->X + Rectangle_player->Width)) )
		if ( ((enm->Position->Y-10) <= Rectangle_missile->Position->Y) &&
			((enm->Position->Y + (enm->Height*enm->Scale->X))+10 >= Rectangle_missile->Position->Y) )
			result_ = enm->Position->X;

	return result_;
}

void __fastcall TfmShooting_main::Button_missileClick(TObject *Sender)
{
	TRectangle* em_buf_{nullptr};       		//敵一旦保存
	KanokeBuf  = nullptr;               		//敵保存変数をクリア
	Button_missile->Enabled				= false;
	Rectangle_missile->Position->Y     	= Rectangle_player->Position->Y + 25;
	FloatAnimation_missile->StopValue   = missile_max;  //ミサイル最終地点設定
	FloatAnimation_missile->StartValue	= Rectangle_player->Position->X + 20;
	auto iExPos	= missile_max;
	auto iEnmX  = missile_max;
	for (int i = 0; i < 3; i++) {/*ループで敵3つを順番に撃破可能か調べる*/
		switch(i){
		case 0: em_buf_ = Rectangle_Enm1; break;
		case 1: em_buf_ = Rectangle_Enm2; break;
		case 2: em_buf_ = Rectangle_Enm3;
		}
		auto iTemp = EnmExist(em_buf_);
		if ((iTemp < missile_max) && (iEnmX > em_buf_->Position->X))
		{   /*敵の前に敵が居る場合, 手前の敵を優先*/
			iExPos		= iTemp;
			KanokeBuf	= em_buf_;
		}
		if (KanokeBuf != nullptr) {//撃破出来る敵変数に存在するか確認
			iEnmX		= KanokeBuf->Position->X;
		}
	}

	if( iExPos < (Rectangle_player->Position->X + Rectangle_player->Width))
		iExPos	= missile_max;  //敵がプレーヤーより後ろにいる場合標的から外す
	FloatAnimation_missile->StopValue	= iExPos;	//ミサイルの目標値をセット
	Rectangle_missile->Visible 			= true;     //ミサイルを表示
	FloatAnimation_missile->Start();                //ミサイル発射
}


TRectangleグローバル変数で1つ用意します。

ミサイルのアニメーション終了OnFinishイベントを使い敵を倒した処理を入れます


Delphi

////
procedure TfmShooting_main.FloatAnimation_missileFinish(Sender: TObject); //第9回
begin
  Button_missile.Enabled    := True;  //ミサイルボタンを有効にする
  Rectangle_missile.Visible := False; //ミサイルを非表示
  if Assigned(KanokeBuff) then        //敵撃破変数に敵存在するか確認
  begin
    KanokeBuff.Visible  := False;     //敵を非表示にする
  end;
  KanokeBuff          := nil;         //敵撃破変数を空にする
end;

C++

////
void __fastcall TfmShooting_main::FloatAnimation_missileFinish(TObject *Sender)
{
	Button_missile->Enabled   	= true;
	Rectangle_missile->Visible 	= false;
	if (KanokeBuf != nullptr) {
		KanokeBuf->Visible     = false;
	}
	KanokeBuf = nullptr;
}


[敵からの攻撃に当たる]


上図の方法で常にプレーヤーと敵が重なっていないかを判断します

敵の攻撃に当たる為のタイマーを追加します

タイマーイベントを追加します

Delphi

////
procedure TfmShooting_main.Timer_gameoverTimer(Sender: TObject);
var
  i: Integer;
  atari_: Boolean;                                            //プレーヤー戦闘機と敵が接触した場合True
  function hantei(r1, r2: TRectF): Boolean;                   //四角どうしが重なっているか判定
  begin
    Result  := False;
    if (r1.Left < r2.Right) and
      (r1.Right > r2.Left)  and
      (r1.Top < r2.Bottom)  and
      (r1.Bottom > r2.Top) then
    begin
      Result  := True;
    end;
  end;
  function Rect_hantei(rect1, rect2: TRectangle): Boolean;    //TRectangleどうしが重なっているか判定
  begin
    if rect2.Visible then
    begin
      Result  := Hantei(
        TRectF.Create(rect1.Position.X, rect1.Position.Y,
        rect1.Position.X + rect1.Width, rect1.Position.Y + rect1.Height
        ),
        TRectF.Create(rect2.Position.X, rect2.Position.Y,
        rect2.Position.X + rect2.Width, rect2.Position.Y + rect2.Height
        ));
    end
    else
      Result  := False;
  end;
begin
  atari_  := False;
  Timer_gameover.Enabled  := False;
  for i := 0 to 3 do  //敵1~3とlaserbeamが戦闘機と接触したかを判定
    case i of
    0: begin
      atari_  := Rect_hantei(Rectangle_player, Rectangle_Enm1);
      if atari_ then Break; end;
    1: begin
      atari_  := Rect_hantei(Rectangle_player, Rectangle_Enm2);
      if atari_ then Break; end;
    2: begin
      atari_  := Rect_hantei(Rectangle_player, Rectangle_Enm3);
      if atari_ then Break; end;
    3: begin
      atari_  := Rect_hantei(Rectangle_player, Rectangle_Enm_laserbeam);
      if atari_ then Break; end;
    end;
  if atari_ then
  begin
    Rectangle_player.Visible  := False;
    ShowMessage('ゲームオーバー');
    game_reset; //ゲームをリセットする
  end
  else
    Timer_gameover.Enabled  := True;

end;


C++

////
bool __fastcall TfmShooting_main::hantei(TRectF& r1,TRectF& r2)
{
	bool b1{false};
	if ( (r1.Left < r2.Right) && (r1.Right > r2.Left) &&
		(r1.Top < r2.Bottom)  && (r1.Bottom > r2.Top) )
	{
		b1 = true;
	}
	return b1;
}

bool __fastcall TfmShooting_main::Rect_hantei(TRectangle* rect1, TRectangle* rect2)
{
	if (rect2->Visible)
	{
		TRectF r1{TRectF(rect1->Position->X, rect1->Position->Y,
		rect1->Position->X + rect1->Width, rect1->Position->Y + rect1->Height)};
		TRectF r2{TRectF(rect2->Position->X, rect2->Position->Y,
		rect2->Position->X + rect2->Width, rect2->Position->Y + rect2->Height)};
		return this->hantei(r1, r2);
	}
	else
	  return false;

}


void __fastcall TfmShooting_main::Timer_gameoverTimer(TObject *Sender)
{
	Timer_gameover->Enabled = false;
	bool atari_{false};
	for (int i =0; i < 4; i++)
		if (! atari_)
		{
			switch(i)
			{
			case 0:
				atari_ = Rect_hantei(Rectangle_player, Rectangle_Enm1);
				break;
			case 1:
				atari_ = Rect_hantei(Rectangle_player, Rectangle_Enm2);
				break;
			case 2:
				atari_ = Rect_hantei(Rectangle_player, Rectangle_Enm3);
				break;
			case 3:
				atari_ = Rect_hantei(Rectangle_player, Rectangle_Enm_laserbeam);
			}
		}

	if (atari_)
	{
		Rectangle_player->Visible  = false;
		ShowMessage("ゲームオーバー");
		game_reset(); //ゲームをリセットする
	}
	else
		Timer_gameover->Enabled	= true;
}
//---------------------------------------------------------------------------

ゲームオーバーリセットの関数を作ります

Delphi

////
procedure TfmShooting_main.game_reset;
begin //ゲームリセット
  Button_up.Visible                 := False; //ボタンUp非表示
  Button_down.Visible               := False; //ボタンDown非表示
  Button_missile.Visible            := False; //ボタンミサイル非表示

  Timer_Enms.Enabled                := False; //敵出現タイマーストップ
  Timer_Enms_laserbeam.Enabled      := False; //敵レーザービームタイマーストップ
  Timer_gameover.Enabled            := False; //プレーヤーと敵接触判定タイマーストップ
  Rectangle_Enm1.Visible            := False; //敵1非表示
  Rectangle_Enm2.Visible            := False; //敵2非表示
  Rectangle_Enm3.Visible            := False; //敵3非表示
  Rectangle_Enm_laserbeam.Visible   := False; //敵レーザービーム非表示
  Rectangle_startscene.Visible  := True;      //スタートシーン表示
end;


C++

////

void __fastcall TfmShooting_main::game_reset()
{
	Button_up->Visible                 = false; //ボタンUp非表示
	Button_down->Visible               = false; //ボタンDown非表示
	Button_missile->Visible            = false; //ボタンミサイル非表示

	Timer_Enms->Enabled                = false; //敵出現タイマーストップ
	Timer_Enms_laserbeam->Enabled      = false; //敵レーザービームタイマーストップ
	Timer_gameover->Enabled            = false; //プレーヤーと敵接触判定タイマーストップ
	Rectangle_Enm1->Visible            = false; //敵1非表示
	Rectangle_Enm2->Visible            = false; //敵2非表示
	Rectangle_Enm3->Visible            = false; //敵3非表示
	Rectangle_Enm_laserbeam->Visible   = false; //敵レーザービーム非表示
	Rectangle_startscene->Visible  	   = true;  //スタートシーン表示
	FiTotal = 0;
    FdtPlay = 0;
}


[githubにソースを公開しております]

https://github.com/mojeld/embarcadero_jp_shooting_game


■次回は12月26日(月)17:00より  “シューティングゲーム スコアとゲームオーバーを付けよう„ をお送りします。


<<第8回 ‟シューティングゲーム 敵を動かしてみよう„  

C++Builderで使うCloud API「駅情報」「路線情報」「会社情報」(駅すぱあとWebサービス) [JAPAN]

$
0
0

C++Builder を使い、駅すぱあとWebサービス(クラウド型API)を利用し

「駅情報」「路線情報」「会社情報」などの情報をRESTで取得する事が可能です。

今回テストしたデバイスはWindows(64Bit)とiOS10.1です。


[駅すぱあとWebサービス]

駅すぱあとWebサービスAPIを利用するには、ユーザー登録が必要です。

「駅情報」や「路線情報」のサービスに関しては無料のフリープランで商用利用可能ですので

まずフリープランの登録を行いました。

https://ekiworld.net/

上記サイトにアクセスし登録を行うとメールが送られてきます。

メールにはアクセスキー、ご登録ドメイン、ドキュメント(リファレンスマニュアル)が書かれています。

その中のアクセスキーが重要で このアクセスキーを使い各APIにアクセスできるようになります。


[駅すぱあとWebサービスフリープランで利用できるサービス]

上記のようなサービスです。

std::mapを使い エンドポイント一覧情報をもたせました。

////
enum TEki_apis_ {info, corporation, search_course_light, rail, line, station, station_light};
	std::map FEndPoint{
		{TEki_apis_::info, 					"/station/info"},
		{TEki_apis_::corporation, 			"/corporation"},
		{TEki_apis_::search_course_light, 	"/search/course/light"},
		{TEki_apis_::rail, 					"/rail"},
		{TEki_apis_::line, 					"/line"},
		{TEki_apis_::station, 				"/station"},
		{TEki_apis_::station_light, 	   	"/station/light"}};

 [TRESTClientを使いクラウドAPI接続](code example)

TRESTClient、TRESTRequestを使い駅すぱあとWebサービスの各APIに接続しJSONを取得します

////
void __fastcall TEki_Api::UpdateExcect()
{

	UnicodeString sUrl = FstBaseURL + FstEndPoint + "?key=" + FstEkiKey + CreateParameters(FEkiApis);
	TThread::CreateAnonymousThread([this, sUrl](){
		std::unique_ptr cl1{/*std::make_unique(*/new TRESTClient(nullptr)};		// TRESTClient* cl1 	= new TRESTClient(nullptr);
		std::unique_ptr re1{/*std::make_unique(*/new TRESTRequest(nullptr)};	//TRESTRequest* re1 	= new TRESTRequest(nullptr);
		re1->Client = cl1.get();
		TJSONValue* jo{nullptr};
		cl1->BaseURL = sUrl;

		try{
			re1->Execute();
			jo = re1->Response->JSONValue;
		}
		catch(Exception& e1){}

		TThread::Synchronize(TThread::CurrentThread, [&](){
			http_json_out(jo);
		});

	})->Start();
}


[駅すぱあとWebサービス JSON](code example)

各API仕様を元にJSON情報を取得します

void __fastcall TForm1::DoEditStation(TObject *Sender)
{
	UnicodeString s_js_function_;
	unsigned int iMaxRecord{0};
	if (!(Sender == nullptr)) {
		TJSONObject* jv 	= static_cast(Sender);
		String a = (static_cast( jv->GetValue("ResultSet") ))->ToString();
		TJSONObject* jv2 	= static_cast( jv->GetValue("ResultSet") );
		Memo1->Lines->Append("max=" + static_cast(jv2->GetValue("max") )->Value());
		iMaxRecord          = StrToIntDef(static_cast(jv2->GetValue("max") )->Value(), 0);
		TJSONArray*  jv3    = static_cast( jv2->GetValue("Point") );
		TJSONObject*  jv4;
		TJSONObject*  jv5;
		TJSONObject*  jvGeoPoint_;
		ListView1->BeginUpdate();
		switch (iMaxRecord) {
		case 0:
			break;
		case 1:
			jv4 = static_cast( jv2->GetValue("Point") );
			jv5 = static_cast( jv4->GetValue("Station") );
			jvGeoPoint_ = static_cast( jv4->GetValue("GeoPoint") );
			s_js_function_ = Format("toNearest(%s, %s)", ARRAYOFCONST((
				jvGeoPoint_->GetValue("lati_d")->ToString(),
				jvGeoPoint_->GetValue("longi_d")->ToString() )));
			StationItemAdd(jv5, s_js_function_);
			break;
		default:
			for (int i=0; i Count; i++){
				jv4 = static_cast(jv3->Get(i));
				jv5 = static_cast( jv4->GetValue("Station") );
				jvGeoPoint_ = static_cast( jv4->GetValue("GeoPoint") );
				s_js_function_ = Format("toNearest(%s, %s)", ARRAYOFCONST((
					jvGeoPoint_->GetValue("lati_d")->ToString(),
					jvGeoPoint_->GetValue("longi_d")->ToString())));
				StationItemAdd(jv5, s_js_function_);
			}
		}
		ListView1->EndUpdate();
		ListView1->Visible      = true;
		ListView1->Width        = FselEdit->Width;
		ListView1->Position->X 	= FselEdit->Position->X;
		ListView1->Position->Y 	= FselEdit->Position->Y + FselEdit->Height;
		if (iMaxRecord > 0)
		{
			ListView1->ScrollTo(0);
		}
	}
}


[駅すぱあと路線図フリープラン]

駅すぱあと路線図を使うにはまた別の申し込みが必要です

これも同じく申し込み後メールでアクセスキーが送られてきます。

「Rosen JS」 と言うJavaScriptで作られた地図機能APIが提供されます。

C++Builder iOSのTLocationSensorを用いて緯度経度を取得しその情報を使い、

TWebBrowser(ブラウザ)からJSの関数EvaluateJavaScript()でキックすることにしました。


Microsoft mentioning RAD Studio Desktop Bridge Support

$
0
0

It is a fairly interesting time to see Microsoft promote RAD Studio Berlin Update 2 support for the "Centennial" bridge, as the only IDE providing this capability out of the box.

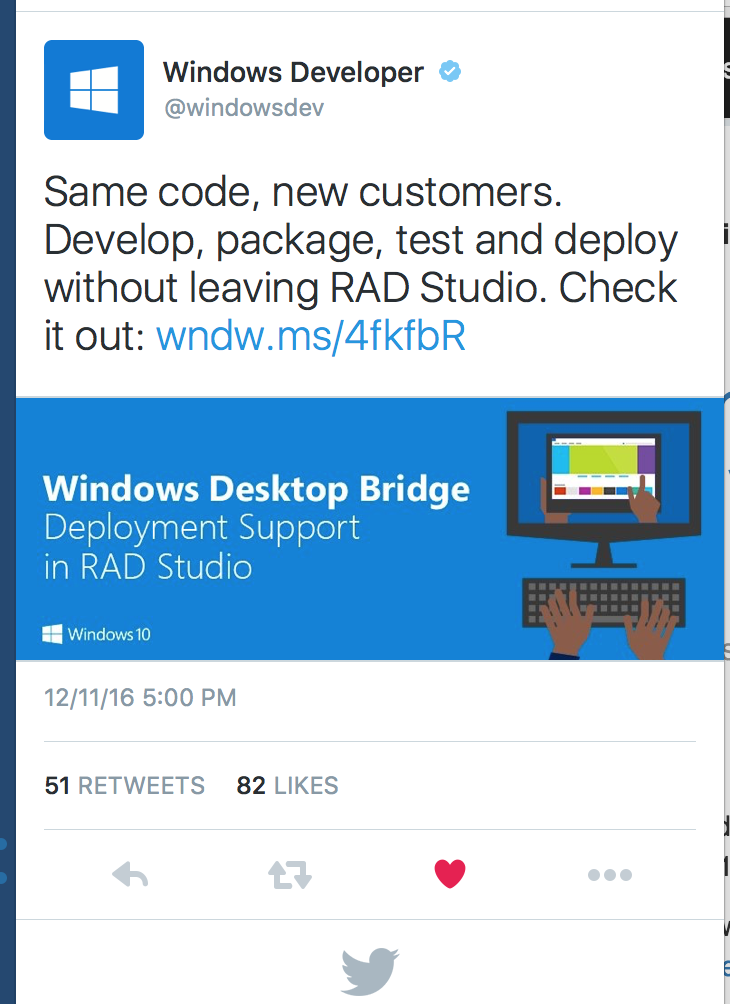
First, Microsoft Windows Developer account tweeted about it at https://twitter.com/windowsdev/status/807978252820221952 (see below):

Second, RAD Studio has been mentioned in the blog post "Conversion options for bringing your existing desktop app to the Universal Windows Platform using the Desktop Bridge" at https://blogs.windows.com/buildingapps/2016/12/08/conversion-options-bringing-existing-desktop-app-universal-windows-platform-using-desktop-bridge, Towards the middle of the long post you can read:

"Additionally, Embarcadero has announced support for the Desktop Bridge in RAD Studio, which lets you directly output a Windows app package through the build process."

And third and even more relevant RAD Studio in mentioned in the official MSDN documentation at https://msdn.microsoft.com/windows/uwp/porting/desktop-to-uwp-root#convert.

For more information on our side, you can refer to:

- The new desktop Bridge landing page: https://www.embarcadero.com/products/rad-studio/windows-10-store-desktop-bridge

- The blog post (and webinar recording) by Pawel: https://community.embarcadero.com/blogs/entry/appx-development-for-windows-10-store (the video is at https://youtu.be/hEOk3Ztm-8g)

- My blog post offering an overview: https://community.embarcadero.com/article/news/16448-rad-studio-berlin-anniversary-edition-support-for-windows-10-anniversary-update-and-the-windows-store

There are more and more of our customers publishing Delphi and C++Builder applications on Windows Store, let us know of any relevant application that gets published so we can track it. As a reference, my "My MiniFigures" store app has been had 420 downloads so far, but I'm sure you can beat it!

Viewing all 503 articles
Browse latest View live


Latest Images

<script src="https://jsc.adskeeper.com/r/s/rssing.com.1596347.js" async> </script>