Quantcast
Channel: Tutorial - Embarcadero Community
Viewing all 503 articles
Browse latest View live

C++Builder を使って AWS S3に接続[JAPAN]

$
0
0

[AWS S3 接続]

Delphi/C++ Builderは Cloudを得意とする複数のコンポーネントがあり

AWS接続のためのTAmazonConnectionInfoコンポーネントも用意されています

Amazon Web Services(AWS) のストレージサービスであるSimple Storage Service(S3)をC++Builderから接続します。


[S3 Bucketを用意します] 

embarcadero-jpと言う名前でBucketを作成しました。


[TAmazonConnectionInfo配置と設定]

TAmazonConnectionInfoを配置します

AccountKey、AccountNameプロパティをIAMと同じ内容を設定します。


[Bucket内のリストを取得する](code example)

////
void __fastcall TForm1::Button1Click(TObject *Sender)
{
	std::unique_ptr<TStringList> list_{new TStringList() };
	std::unique_ptr<TAmazonStorageService> s3{new TAmazonStorageService(AmazonConnectionInfo1)};
	TCloudResponseInfo* res_{new TCloudResponseInfo()};
	try
	{
		TAmazonBucketResult* bs = s3->GetBucket("embarcadero-jp", list_.get(), res_, TAmazonRegion::amzrAPNortheast1);
		Memo1->Lines->Text = list_->Text;
		for (auto obj_:bs->Objects)
		{
			Memo1->Lines->Append(obj_.Name + " size=" + (String)obj_.Size);
		}
	}
	__finally
	{
		delete res_;
	}
}

[バイナリデータ UploadObject / GetObject](code example)

////
void __fastcall TForm1::Button1Click(TObject *Sender)
{
	std::unique_ptr<TStringList> list_{new TStringList() };
	std::unique_ptr<TAmazonStorageService> s3{new TAmazonStorageService(AmazonConnectionInfo1)};
	TCloudResponseInfo* res_{new TCloudResponseInfo()};
	try
	{
		std::unique_ptr<TMemoryStream> mm{new TMemoryStream()};
		mm->LoadFromFile("C:\\Embarcadero\\devcam33\\AWS_S3_cpp\\amane-phone.jpg");
		DynamicArray<Byte> arr1;
		arr1.Length 	= mm->Size;
		mm->ReadBuffer(arr1, mm->Size);
		mm->Position 	= 0;
		s3->UploadObject("embarcadero-jp", "amane-phone.jpg", arr1, true, nullptr, nullptr, TAmazonACLType::amzbaPublicRead, res_);

		mm->Clear();
		TAmazonGetObjectOptionals* op_{new TAmazonGetObjectOptionals()};
		s3->GetObject( "embarcadero-jp", "amane-phone.jpg", mm.get(), res_);

		Image1->Bitmap->LoadFromStream(mm.get());

	}
	__finally
	{
		delete res_;
	}
}


GetObjectでデータがTStreamで返ってきますので

Image1->Bitmap->LoadFromStream(mm.get());としています


C++Builder About noexcept & throw[JAPAN]

$
0
0

"noexcept" has been added since C++11. The "throw" attached to the method from C++1z(17) may be an error.

////
void func() throw() {} //C++17 Error

void func() {} //C++17 OK


It is possible to add "noexcept" to a method from C++11.

////
void func() noexcept(false)
{
	throw std::runtime_error("error");
}

//Exception handling is ignored if it is below.
void func() noexcept //noexcept(true)
{
	throw std::runtime_error("error");
}


The following is how to use in the internal method.

////
void __fastcall TForm1::Button2Click(TObject *Sender)
{
	int i = noexcept(StrToInt("A")); //There is also this usage.
	Memo1->Lines->Append((String)i);
}


////
void __fastcall TForm1::Button2Click(TObject *Sender)
{
	TComponent* c1;// = new TComponent(this);
	int i = noexcept((int)c1->Tag); //It does not cause an error.
    Memo1->Lines->Append(static_cast<String>(i));
}

Considering the future, it is better not to use "throw" after the method.

It's because of the transition to "C++1z".

Custom buttons and the integrated Style Designer

$
0
0

With the integrated Style Designer in RAD Studio Berlin, you can quickly create custom image buttons. For creating entire multi-device styles from scratch, we recommend you use the Bitmap Style Designer, available via the Tools menu.

  1. Create a new FireMonkey multi-device application.
  2. Select a "Style" from the drop-down menu in the FireUI Designer. This will allow you to create a custom style for that platform. You can also change the platform in the Style Designer later.
  3. Drop a TButton onto your form.
  4. Right-click on the button and select "Edit Default Style".
  5. Drag and drop TImage from the Object Inspector onto the buttonstyle layout in the Structure pane.
  6. Select Image1Style in the Structure pane.
  7. In the ObjectInspector, select MultiResBitmap and load your image file (e.g. battery.png) and set Margins.
  8. Select "buttonstyle" in the Structure Pane, then change the name in the Object Inspector to make the style easily identifiable in the list of style elements (e.g. buttonstyle_battery).
  9. Apply the changes and close the Style Designer by clicking on the "x" in the top right hand corner.
  10. Ensure that the StyleBook property for your form is set to StyleBook1.
  11. Select the button control on your form, and set StyleLookUp to buttonstyle_battery.
  12. Repeat the steps to create a custom button style for each platform.


When right-clicking on a FireMonkey control, you see two different style related options:

Edit Default Style:

  • Opens a new FireMonkey Style Designer window in which you can modify the style for the component class. For example, if you right-clicked a button, you can modify the "buttonStyle" object (a default style for the TButton class).

Edit Custom Style:

  • Opens a new FireMonkey Style Designer window in which you can modify the selected control style. For example, if you right-clicked a button, you can modify the "button1Style" object (a style for this button only).


Special Offers

Get More. Do More. Spend Less

Six Great Offers for the Holiday Season. Get RAD Studio Berlin today!


【Delphi / C++Builder Starter チュートリアルシリーズ】 第10回 ‟シューティングゲーム スコアとゲームオーバーを付けよう„ [JAPAN]

$
0
0

【Delphi / C++Builder Starter チュートリアルシリーズ】

第10回 ‟シューティングゲーム スコアとゲームオーバーを付けよう„

10月24日より始まりました 「Delphi / C++Builder Starter チュートリアルシリーズ」。全10回、12月26日まで、毎週17時より30分間で、無料でダウンロード&利用できる開発環境のDelphi / C++Builder Starter エディションを使用して、ゲームを作るまで一通り、セミナーを実施してまいります。


なお、前回および初回分の内容に関するブログ記事は以下のリンクからお読み頂けます。

<< 第9回 ‟シューティングゲーム 敵を攻撃しよう„ 

<< 第1回 ‟無料で始めよう アプリ作成„ 


[アジェンダ]

  • スコア表示
  • プレーヤー / 敵の爆発
  • ゲームオーバー画面


[開発環境インストール] 

[Delphi / C++Builder Starter チュートリアルシリーズ]  第1回 ‟無料で始めよう アプリ作成„をご参考になり、開発環境をインストールしてください。 


 [シューティングゲーム用ドット絵フリー素材] 

http://mfstg.web.fc2.com/material/index.html 
上記サイトの画像を使わせて頂きました。(ありがとうございます)


[スコア表示]

敵を倒した回数の表示と、ゲームを開始してからの時間を表示する為にまずは

2つのグローバル変数が必要となります。


敵を倒した回数

スコア変数を作成しておきます。

////
//Delphiコード
var
 FiTotal:Integer := 0; //スコア変数を追加
////
//C++コード
 int FiTotal{0}; 	//スコア変数を追加

第8-9回で作成したプレーヤー側ミサイルアニメーションOnFinishで

敵を倒した場合の処理にスコア加算コードを追加します。

////
//Delphiコード
procedure TfmShooting_main.FloatAnimation_missileFinish(Sender: TObject);
begin
  Button_missile.Enabled    := True;  //ミサイルボタンを有効にする
  Rectangle_missile.Visible := False; //ミサイルを非表示
  if Assigned(KanokeBuff) then        //敵撃破変数に敵存在するか確認
  begin
    Inc(FiTotal);//スコアに+1する処理
    KanokeBuff.Visible  := False;     //敵を非表示にする
  end;
  KanokeBuff          := nil;         //敵撃破変数を空にする
end;
////
//C++コード
void __fastcall TfmShooting_main::FloatAnimation_missileFinish(TObject *Sender)
{
	Button_missile->Enabled   	= true;
	Rectangle_missile->Visible 	= false;
	if (KanokeBuf != nullptr) {
		FiTotal++;//スコア変数を+1
		KanokeBuf->Visible     	   = false;
	}
             KanokeBuf = nullptr;
}


スタートからのトータル時間表示用の変数も用意します

////
//Delphi コード
var
 FdtPlay: TDateTime=0; //トータル時間変数を追加
////
//C++コード
 TDateTime FdtPlay{0}; //トータル時間変数を追加

スタート画面の「START」した後に今の時間を入れる

////
//Delphi コード
procedure TfmShooting_main.FloatAnimation_player_xFinish(Sender: TObject);
begin
  Button_missile.Visible        := True;
  Button_up.Visible             := True;
  Button_down.Visible           := True;
  Timer_Enms.Enabled            := True;
  Timer_Enms_laserbeam.Enabled  := True;
  FdtPlay                       := Now;
end;

////
//C++ コード
void __fastcall TfmShooting_main::FloatAnimation_player_xFinish(TObject *Sender)
{
	Button_missile->Visible         = true;
	Button_up->Visible		    = true;
	Button_down->Visible	    = true;
	Label_score->Visible	    = true;
	Timer_Enms->Enabled     	    = true;
	Timer_Enms_laserbeam->Enabled   = true;

	FdtPlay = Now();
}

トータル時間とスコアを表示する。

TLabelを使って表示する場所を作成する 

敵の攻撃用に作成したTimer_Enms_laserbeamタイマーが05秒Intervalでしたので

Timer_Enms_laserbeamのOnTimerイベント内のコード後に

スコア表示のコードを追記します。

////
//Delphi コード
procedure TfmShooting_main.Timer_Enms_laserbeam_Timer(Sender: TObject);
Begin
  (敵がレーザービームを発射部分 省略)

  Label_score.Text  := Format('Time %s / Total Score %0.9d', [
      FormatDateTime('hh:nn:ss', Now - FdtPlay), FiTotal
    ]);
end;

////
//C++コード
void __fastcall TfmShooting_main::Timer_Enms_laserbeamTimer(TObject *Sender)
{
	(敵がレーザービームを発射部分 省略)

	Label_score->Text	= Format(L"Time %s / Total Score %0.9d", ARRAYOFCONST((
		FormatDateTime("hh:nn:ss", Now() - FdtPlay), FiTotal))
	);
}


[プレーヤー / 敵の爆発]

プレーヤー(戦闘機)が敵に衝突したり敵がミサイルに敵にヒットした場合アニメを使って爆発させています

TRectangleとTBitmapAnimationを応用して爆発を作ります。爆発に使う画像は7枚です。

爆発っぽく見えればいいので TBitmapAnimationをネストさせました。

TRectangleのFill画像にTBitmapAnimationを割り当て

割り当てたTBitmapAnimation.StopValueにさらにTBitmapAnimationを割当てています

爆発用TRectangle+TBitmapAnimationオブジェクトを

敵用とプレーヤー(戦闘機)用2つ用意します。

  • Rectangle_player_Bomb1(プレーヤー用TRectangle)
    • ScaleのXとYを2として敵爆発に比べて倍の大きさにしています。
  • Rectangle_enm_Bomb1(敵用TRectangle)

としました。


Rectangle_player_Bomb1(プレーヤー側)


爆発させる為の関数を用意します

////
//Delphiコード
procedure TfmShooting_main.Bomb_Start;
begin
  //プレーヤー(戦闘機)の爆破アニメーション実行
  Rectangle_player_Bomb1.Position.Y := Rectangle_player.Position.Y - 30;
  Rectangle_player_Bomb1.Visible  := True;
  BitmapAnimation_player_Bomb1.Start; //ネストしているアニメをすべてスタートさせます
  BitmapAnimation_player_Bomb2.Start;
  BitmapAnimation_player_Bomb3.Start;
  BitmapAnimation_player_Bomb4.Start;
  BitmapAnimation_player_Bomb5.Start;
  BitmapAnimation_player_Bomb6.Start;
end;
////
//C++コード
void __fastcall TfmShooting_main::Bomb_Start()
{
	//戦闘機の爆破アニメーション実行
	Rectangle_player_Bomb1->Position->Y	= Rectangle_player->Position->Y - 30;
	Rectangle_player_Bomb1->Visible	= true;
	BitmapAnimation_player_Bomb1->Start();
	BitmapAnimation_player_Bomb2->Start();
	BitmapAnimation_player_Bomb3->Start();
	BitmapAnimation_player_Bomb4->Start();
	BitmapAnimation_player_Bomb5->Start();
	BitmapAnimation_player_Bomb6->Start();
}

Rectangle_player_Bomb1(プレーヤー側)イベント側で爆発関数実行

////
//Delphiコード
procedure TfmShooting_main.Timer_gameoverTimer(Sender: TObject);
begin
  //(省略)
 if atari_ then
  begin
    //(省略)
    Bomb_Start;
    ShowMessage('ゲームオーバー');
  end
  else
    Timer_gameover.Enabled  := True;
end;
////
//C++コード
void __fastcall TfmShooting_main::Timer_gameoverTimer(TObject *Sender)
{
	(省略)
	if (atari_)//敵に衝突した
	{
		Bomb_Start();
		Rectangle_player->Visible  = false;
		ShowMessage("ゲームオーバー");
		game_reset(); //ゲームをリセットする
	}
	else
		Timer_gameover->Enabled	= true;
}

BitmapAnimation_player_Bomb6のOnFinishで爆発を消火する

////
//Delphiコード
procedure TfmShooting_main.BitmapAnimation_player_Bomb6Finish(Sender: TObject);
begin
  Rectangle_player_Bomb1.Visible  := False; //戦闘機爆破アニメ非表示
    Rectangle_player.Visible        := False; //戦闘機非表示
end;
////
//C++コード
void __fastcall TfmShooting_main::BitmapAnimation_player_Bomb6Finish(TObject *Sender)

{
	Rectangle_player_Bomb1->Visible	= false;	//戦闘機爆破アニメ非表示
	Rectangle_player->Visible		= false;	//戦闘機非表示
}

Rectangle_enm_Bomb1(敵側)爆発させる為の関数を用意します

////
//Delphiコード
procedure TfmShooting_main.Bomb_Enm;
begin
  //敵の爆破アニメーション実行
  Rectangle_enm_Bomb1.Visible  := True;
  BitmapAnimation_enm_Bomb1.Start;
  BitmapAnimation_enm_Bomb2.Start;
  BitmapAnimation_enm_Bomb3.Start;
  BitmapAnimation_enm_Bomb4.Start;
  BitmapAnimation_enm_Bomb5.Start;
  BitmapAnimation_enm_Bomb6.Start;
end;


プレーヤーミサイルアニメOnFinishイベント側で爆発関数実行

////
//Delphiコード
procedure TfmShooting_main.FloatAnimation_missileFinish(Sender: TObject);
begin
  if Assigned(KanokeBuff) then        //敵撃破変数に敵存在するか確認
  begin
    Inc(FiTotal);
    Rectangle_enm_Bomb1.Position  := KanokeBuff.Position;
    Bomb_Enm;
    KanokeBuff.Visible  := False;     //敵を非表示にする
  end;
  KanokeBuff          := nil;         //敵撃破変数を空にする
end;


BitmapAnimation_enm_Bomb6のOnFinishで爆発を消火する

////
//Delphiコード
procedure TfmShooting_main.BitmapAnimation_enm_Bomb6Finish(Sender: Tobject);
Begin
  Rectangle_enm_Bomb1.Visible  := False; //敵爆破アニメ非表示
    Rectangle_enm.Visible        := False; //敵非表示
end;
////
//C++コード
void __fastcall TfmShooting_main::BitmapAnimation_enm_Bomb6Finish(TObject *Sender)

{
	Rectangle_enm_Bomb1->Visible	 = false;	//敵爆破アニメ非表示
	Rectangle_enm->Visible	 = false;	//敵非表示
}


[ゲームオーバー画面]

ゲームオーバー画面はスタート画面のように画面サイズに合わせてTRectangleで作成します

  • TRectangle
  • Tlabelを3つ
  • TFloatAnimation


Timer_gameover (TTimer)イベントの敵と衝突した判定部で


ゲームオーバー画面をアニメーションで出す

////
//Delphiコード
procedure TfmShooting_main.Timer_gameoverTimer(Sender: TObject);
Begin
 (省略)
 if atari_ then
  begin
    Bomb_Start;//爆発
    Rectangle_gameoverscene.Position.Y  := -480;  	//ゲームオーバー画面の準備
    Rectangle_gameoverscene.Visible := True;
    Label_gameover_score1.Text      := Label_score.Text;  //スコア文字列コピー
    FloatAnimation_Gameover1.Start;                       //ゲームオーバーアニメスタート
//    ShowMessage('ゲームオーバー');
  end
  else
    Timer_gameover.Enabled  := True;
end;
////
//C++コード
void __fastcall TfmShooting_main::Timer_gameoverTimer(TObject *Sender)
{
	(省略)
	if (atari_)
	{
		Bomb_Start();//爆発
		Rectangle_gameoverscene->Position->Y	= -480;             //ゲームオーバー画面の準備
		Rectangle_gameoverscene->Visible	= true;
		Label_gameover_score1->Text		= Label_score->Text;//スコア文字列コピー
		FloatAnimation_Gameover1->Start();                     	 //ゲームオーバーアニメスタート
//		Rectangle_player->Visible  = false;
//		ShowMessage("ゲームオーバー");
	}
	else
		Timer_gameover->Enabled	= true;
}

Rectangle_gameoversceneのOnClickにて 再度スタート画面

第9回でTimer_gameoverタイマーイベントにあったgame_reset()関数を使います

////
//Delphiコード
procedure TfmShooting_main.Rectangle_gameoversceneClick(Sender: TObject);
begin
  game_reset; //ゲームをリセットする
end;
////
//C++コード
void __fastcall TfmShooting_main::Rectangle_gameoversceneClick(TObject *Sender)
{
    game_reset();   //ゲームをリセットする
}


[githubにソースを公開しております]

https://github.com/mojeld/embarcadero_jp_shooting_game


<<第9回 ‟シューティングゲーム 敵を攻撃しよう„

Applying a custom style to your Windows and Mac application

$
0
0

I recently got a question on how to best apply a custom FireMonkey style to a Windows and Mac application. We have detailed documentation and videos on working with custom styles, but I thought I would provide a quick tutorial today that outlines the key steps.

Part of our Bonus Pack (available to Update Subscription customers) are over ten premium FireMonkey styles. These styles allow you to quickly overhaul the look of your application with a custom look and feel. Each style has built-in support for multiple resolutions.

Answering the Question: Do I have Berlin Update 2?

$
0
0

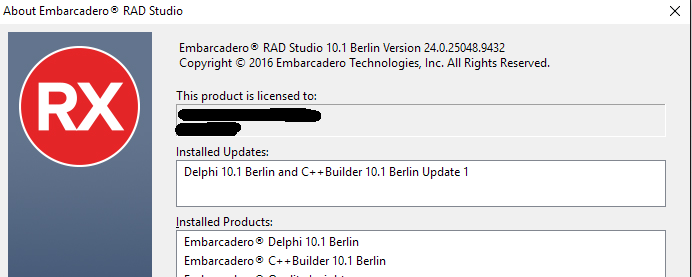
There is a glitch in RAD Studio Berlin Update 2: For some users the About Box indicates the wrong version number in the "Installed Updates" field.

An example is below:

So how do you know if you actually have Update 2 installed? An easy way is to keep an eye to the Splash Screen, which was updated with the fireworks:

The more official way is to check in the About Box the actual version number. As you can see in the first image above:

Berlin Update 2 has version number 24.0.25048.9432

Berlin Update 1, instead, had version number 24.0.24468.8770

The first release (RTM) of Berlin was 24.0.22858.6822


Free DevOps Open Online Course

$
0
0

Oracle Cloud DevOps Tools and Solutions

Massive Open Online Course (MOOC)

In this free course, you will learn to use Oracle’s Cloud tools and solutions to speed up application development lifecycles, and ensure predictability for both developers and operations personnel.

Topics covered in this MOOC

• DevOps Overview

• Test-Driven Development (TDD) Using Python or Java

• Agile and Project Management with Oracle Developer Cloud Service

• Continuous Integration and Deployment with Oracle Developer Cloud

• Write and Deploy Code using Oracle Developer Cloud Service

Logistics

Lessons will be released from January 13, 2017 through February 3, 2017.

The lecture is through videos, which are available 24/7. Take the course at your own pace, and interact with other students (and the instructors) through the forum. Each week, one or more lessons will be released. Each lesson contains the video materials to watch, homework and exercises for you to work on, and a quiz to assess your learning.

How to register

• Go to https://www.oracle.com/goto/DevOps

• Login to the page.

• Click the Enroll button.

Please note: Enrollment is a multi-step process. Until your enrollment is approved, you will not have access to the course materials.

Oracle.PNG

 OLL.PNG
What is a MOOC?

•   We designed Oracle Massive Open Online Courses (MOOCs) to provide you with the training you need anytime, anyplace and completely free! Our focus is to help you sharpen a set of skills that you can apply right away. We focus on current products and technologies, and our experts develop the MOOC content. What do you do in a MOOC? You will watch high quality video lectures, work on hands-on labs, and take quizzes. We help you create a lab environment to work in, or provide one for you. Through our dedicated forums, you have access to our experts, and can interact with others enrolled in the MOOC. We hope to see you in a MOOC soon!

Connect with us

blogs.oracle.com/oracle

facebook.com/oracle

twitter.com/oracle

oracle.com

For More Information

Contact: 1.800.ORACLE1

Connecting the new Windows 10 Calendar Controls to data using the LiveBindings Designer

$
0
0

Pawel recently did a great post on making the Windows 10 calendar controls database aware. I thought I would follow that up with a post on connecting the new Windows 10 VCL calendar controls to data using the LiveBindings Designer. 

In this post, I am going to connect TCalendarView to sample data and enable color changing of the calendar's background color using TColorBox. None of this involves any code as everything is set up using the LiveBindings Designer.


World First! A linux web service written in Delphi.

$
0
0

Several years ago, I wrote a simple command line tool for parsing EBNF format text (ISO-14977), and translating them into railroad diagrams. This little tool parsed the text and generated HTML output with a canvas control set to render the diagram.

I had thought that this tool was too specialist for anyone to be using it, however, when I rebooted my blog after starting my employment with Embarcadero, I was contacted by someone asking what I’d done with the tool as it was no longer available at my website.
ISO-14977 Compliant EBNF railroad diagrams.

Well, I’d always wanted to turn this little tool into a web service but time had not been in abundance for it. Having acquired a copy of the new RAD Studio Beta which includes Linux support, it seemed like the ideal time to make the conversion of this tool to a service. So that’s what I did, I ported the code over to build an Apache module to run under my Ubuntu web server.

The service has two endpoints. The first simply spits out some HTML to present an input form with a submit button…

I can enter one or more rules in EBNF format and when I hit the submit button, I get my railroad diagram…

Unfortunately, I’ve also managed to introduce one or two memory leaks into the code as I did the conversion. I suspect (though I’ve not yet confirmed), the new compiler utilizes the ARC memory management system, and my code was written pre-ARC.  So in short, there is still some work to do before I can consider this service complete. I may even consider making it a RESTFUL API at some point.

Most importantly though. I’d like to take this opportunity to claim my “I did it First!” badge for a Linux web service written in Delphi!  I know that the development team no doubt have created unit test services, and some of the other Beta users may well have created “Hello World” Apache modules, but I think it’s not unfair for me to discount those services, if they exist, on the grounds that they’re not actually useful.  Of course the usefulness of my EBNF diagram service does depend on you having need of such a tool, but it does indeed perform a useful function if you have that need.

Now for the bad news.
I’m not ready to share the service with you yet! I’d really like to, but the only place I have to host it is the very same web server which hosts this website. Given that I know there are memory leaks and even one potential infinite loop, I don’t want to publish the service until I can be certain it’ll behave (at least somwhat assured if not certain).

So, while this post lacks some of the more technical detail that I have been aiming for for my blog posts of late, I hope you’ll at least appreciate that I’m working towards useful things to share with you.

Thanks for reading!

About "any type" in C++11[JAPAN]

$
0
0

About "any type" in C++11[JAPAN]

C++1z(C++17) expects "std::any" to be prepared.

C++Builder(C++11) can use boost. Its version is 1_55.

////
#define BOOST_VERSION 105500
#define BOOST_LIB_VERSION "1_55"

"boost::any" can be used. 

////
#include <boost/any.hpp>;
////

void __fastcall TForm1::Button1Click(TObject *Sender)
{
	//value of the float
	boost::any button_and_float = BOOST_VERSION + 0.0001;

	//Place TButton in the same variable.
	//But, it does not go out error.
	button_and_float = new TButton(this);
    //This can be used if the cast. It can be used as Button.
	auto button2 = boost::any_cast<TButton* >(button_and_float);
	button2->Parent = this;
	button2->Top    = 200;
	button2->Left	= 200;
	button2->Width	= 200;
	button2->Name   	= "Button2";
	button2->Caption	= "Any Button2";
}

In this way, you can use it.


//---------------------------------------------------------------------------
void __fastcall TForm1::Button1Click(TObject *Sender)
{
	//value of the float
	boost::any button_and_float = BOOST_VERSION + 0.0001;
	boost::any event_ 	= static_cast<void*>([](TObject* Sender){ShowMessage("event");});
	TMethod method_;
	method_.Data        = nullptr;
	method_.Code        = boost::any_cast<void* >(event_);

	//Place TButton in the same variable.
	//But, it does not go out error.
	button_and_float = new TButton(this);
	//This can be used if the cast. It can be used as Button.
	auto button2 = boost::any_cast<TButton* >(button_and_float);
	button2->Parent = this;
	button2->Top    = 200;
	button2->Left	= 200;
	button2->Width	= 200;
	button2->Name   	= "Button2";
	button2->Caption	= "Any Button2";
	button2->OnClick    = reinterpret_cast<TNotifyEvent&>(method_);
}


macOS Sierra および iOS Simulator 向けの Debugger Hotfix がリリースされました [JAPAN]

$
0
0

2017/1/11付けの David Millington 氏のブログ記事にて案内されていますとおり、macOS Sierra および iOS Simulator 向けの Debugger Hotfix がリリースされました。

Hotfix は下記URLよりダウンロードできます。
http://cc.embarcadero.com/item/30680

この Hotfix をインストールすることで、macOS Sierra や iOS Simulator 向けのデプロイやデバッグに関する問題が解消されます。

なお、readme にて説明されているインストール手順が少々冗長でしたので、これをもうちょっとシンプルに行う方法をご案内します。

Use FireDAC to MSSQL Server in parallel(std::vector<std::thread>)[JAPAN]

$
0
0

std::thread exists.It is in the standard from C++11.

Insert data in MS-SQL Server in this way.

The data is a Japanese address CSV. that is,

It is in the post office in Japan web site.

The data looks something like this.

"0600000","北海道","札幌市 中央区","以下に掲載がない場合","HOKKAIDO","SAPPORO SHI CHUO KU","IKANIKEISAIGANAIBAAI"
"0640941","北海道","札幌市 中央区","旭ケ丘","HOKKAIDO","SAPPORO SHI CHUO KU","ASAHIGAOKA"
"0600041","北海道","札幌市 中央区","大通東","HOKKAIDO","SAPPORO SHI CHUO KU","ODORIHIGASHI"

It is a CSV mixed with Japanese.

To insert with TFDQuery,TFDConnection, do this.

////
		inline static void sql_add(String sql_values)
		{
			CoInitialize(nullptr);
			try
			{
				std::unique_ptr<TFDConnection> fdc_{std::make_unique<TFDConnection>(nullptr)};
				std::unique_ptr<TFDQuery> query_{std::make_unique<TFDQuery>(nullptr)};

				try
				{
					fdc_->DriverName 	= "MSSQL";
					fdc_->LoginPrompt   = false;
					fdc_->Params->Append("Server=localhost");
					fdc_->Params->Append("User_Name=sa");
					fdc_->Params->Append("Password=test");
					fdc_->Params->Append("Database=dbname");
					fdc_->Params->Append("DriverID=MSSQL");
					fdc_->Connected     = true;
					query_->Connection  = fdc_.get();
					query_->SQL->Text 	= sql_values;
					std::cout << (static_cast<AnsiString>(sql_values)).c_str() << "\n";
					query_->ExecSQL();
				}
				catch(...){}
			}
			__finally
			{
				CoUninitialize();
			}

		}


Read "CSV File" and loop processing.This is making 5 threads.

I used std::thread, but I think that System.Threading.TTask is also good.

////
		void load_csv(String csv_filename , std::function<void(String)> aproc)
		{
			std::unique_ptr<TStringList> csv =std::make_unique<TStringList>();
			try
			{
				int count_{0};
				csv->LoadFromFile(csv_filename, System::Sysutils::TEncoding::ANSI);

				for (int i=0; i < csv->Count; i++)
				{
					//aproc(csv->Strings[i]);

					std::vector<std::thread> v1;
					v1.clear();
					for (int th_count = 0; th_count < 5; th_count++) {
						if ((i+th_count) < csv->Count)
						{
							String line_ = csv->Strings[i+th_count];
							v1.push_back(std::thread([&](){aproc(line_);}));
						}
					}
					for (auto th_= v1.begin(); th_!=v1.end(); th_++) {
						th_->join();
					}
					Sleep(100);
					i +=4;
				}
				for (AnsiString line: csv.get())
				{

					count_++;
				}
			}
			catch(...){}
		}


It is a function calling "void load_csv(String csv_filename , std::function<void(String)> aproc)" and lambda.

////
		void start()
		{
			load_csv("C:\\Embarcadero\\ado_zip_insert\\KEN_ALL_ROME_test.CSV",
				[&](String aline){
					String sql_;
					std::wstringstream cols_;
					std::wstring value_;
					try
					{
						cols_.str(StringReplace(aline,L"\"", "",TReplaceFlags()<<rfReplaceAll).w_str());
						while (std::getline(cols_, value_, L',')){
							sql_ = sql_ + "'" + value_.c_str() + "',";
						};
						sql_add(
							Format(L"insert into T_ZIP values(%s, getdate())",
							ARRAYOFCONST(( sql_.Delete(sql_.Length(), 1) ))) );
					}
					catch(...){}
				}
				);
		}


Call on the main.

////
#include <FireDAC.Comp.Client.hpp>
#include <FireDAC.Comp.DataSet.hpp>
#include <FireDAC.DApt.hpp>
#include <FireDAC.DApt.Intf.hpp>
#include <FireDAC.DatS.hpp>
#include <FireDAC.Phys.hpp>
#include <FireDAC.Phys.Intf.hpp>
#include <FireDAC.Phys.MSSQL.hpp>
#include <FireDAC.Phys.MSSQLDef.hpp>
#include <FireDAC.Stan.Async.hpp>
#include <FireDAC.Stan.Def.hpp>
#include <FireDAC.Stan.Error.hpp>
#include <FireDAC.Stan.Intf.hpp>
#include <FireDAC.Stan.Option.hpp>
#include <FireDAC.Stan.Param.hpp>
#include <FireDAC.Stan.Pool.hpp>

#include <functional>
#include <memory>
#include <sstream>
#include <thread>
#include <vector>


////
namespace yubin_postoffice_japan
{
	struct Tmssql_import
	{
		Tmssql_import()
		{
			start();
		}
		~Tmssql_import(){}
		inline static void sql_add(String sql_values)
		void load_csv(String csv_filename , std::function<void(String)> aproc)
		void start()
	};
}


 It is a project of console application.

////
int _tmain(int argc, _TCHAR* argv[])
{
	using namespace yubin_postoffice_japan;
	TDateTime dtTemp{Now()};
	Tmssql_import();
	String out = "elapsed time "+FormatDateTime("hh:nn:ss.zzz", Now() - dtTemp);
	std::cout << out.c_str() << std::endl;
	OutputDebugString(out.w_str());

	return 0;
}


Delphi Blogs of the Week/Month #49

$
0
0

The first list of interesting links and blog post of 2017, focused on Delphi development.

Embarcadero Udpates

Press release "Embarcadero Announces RAD Studio Desktop Bridge Support for Windows 10 Deployments" including a comment by Kevin Gallo, corporate vice president for the Windows developer platform at Microsoft at http://www.businesswire.com/news/home/20170110005908/en

This press release got also referenced by SD Times at http://sdtimes.com/swift-announces-new-project-lead-embarcadero-updates-rad-studio-and-spare5-relaunches-as-mighty-ai-sd-times-news-digest-jan-11-2017/

There is Debugger Hotfix for macOS Sierra and the iOS Simulator for 10.1 Berlin. Information at https://community.embarcadero.com/blogs/entry/debugger-hotfix-for-macos-sierra-and-the-ios-simulator and download at http://cc.embarcadero.com/item/30680

Blog Posts

World First! A Linux web service written in Delphi by Craig at http://chapmanworld.com/2017/01/12/world-first-a-linux-web-service-written-in-delphi/

Got a link to this fairly interesting blog on Delphi: https://blog.grijjy.com/

Did you ever use Bold? Check out http://boldfordelphi.blogspot.it/2017/01/help-me-to-make-bold-open-source-project.html

I don't know who write this and don't agree in full (and it stirred some discussion), but I found it interesting: https://medium.com/@srcstorm/pascal-independent-language-for-2017-a5a25f7c62d8#.n88868sta

A Delphi wrapper for Slack API by Andrea at https://blog.andreamagni.eu/2017/01/introducing-sdriver-a-delphi-wrapper-for-slack-api/

Integrating with you favorite CRM/ERP web based client -- or poor mans integration? -- by Steffen at http://fixedbycode.blogspot.it/2017/01/integrating-with-you-favorite-crmerp.html

Webinars and More

Check out 2017 upcoming Delphi webinars at https://community.embarcadero.com/article/16466-upcoming-2017-webinars

In particular, there is a new BootCamp focused on Arduino and IoT early February, that looks pretty interesting. More information to come.


IoT Boot Camp – Rapidly building a connected network of devices.

$
0
0
Arduino and RAD Server / IoT Boot CampArduino and RAD Server / IoT Boot Camp

IoT Boot Camp – From Arduino to any programming language

On the 6th February Embarcadero is running a free developer IoT boot camp, specifically looking at making some cool IoT devices and then building a network of connected devices using ThingPoints™ with RAD Server™.

During the boot camp you will learn how to work and build IoT Devices using Arduino maker boards and integrate them (along with another 50+ IoT device that RAD Studio IDE includes components for) into a RESTful middle-tier that can be accessed via any leading development language easily.

Day 1 – Building an IoT device with Arduino Day 2 – Programmatically controlling your IoT device Day 3 – Building a centrally managed distributed IoT network Day 4 – Connecting to the IoT network with multiple development languages

Options for coding along at home

While not necessary, you will get more out of the Boot Camp if you can follow along at home.

On day 1, you will go over the steps to make a IoT board using Visuino  (who have teamed up with the guys at Maker Fabs to create a hardware kit you can order in).

On day 2 you can connect to an IoT device component from the list of 50+ components available in the GetIt package Manager. (not on the latest RAD Studio? Download the trial to explore the options.)

On day 3 Connect to and use the IoT devices via REST as we establish the devices into a self managed network of IoT devices that allows device discovery – This will use RAD Server.

On day 4 you can see how to consume the REST Server from any leading programming language by using YAML and SwaggerUI via RAD Server.

Register & Download the trial

Register your free space on Boot Camp

Register Now Download your free 30 day RAD Studio trial*

*Boot Camp will use RAD Studio 10.1.2 Berlin Enterprise.  You will need  Delphi, C++ or RAD Studio Enterprise license on you machine for boot camp. If you already have 10.1 Berlin Starter or Professional installed, you may want to use a VM to run the trial (or you can upgrade now – check out the latest offers that include FREE RAD Server licenses

The post IoT Boot Camp – Rapidly building a connected network of devices. appeared first on Stephen Ball's Technical Blog.

In the C++Builder of RAD Server, FireDAC + SQLServer connection.[JAPAN]

$
0
0

I explained the FireDAC + SQL Server connection in the previous parallel processing.

// Use FireDAC to MSSQL Server in parallel(std::vector<std::thread>)[JAPAN]

The "japan post office data"(SQL import) used last time is used from RAD Server.

We will create a new RAD Server project this time. That's C++Builder.

I have created one resource data module(TTestResource1). And we prepared a data module(TDataModule2) for one FireDAC.

We will create a single suffix for the resource. It is a member function.

////
class TTestResource1 : public TDataModule
{
__published:
private:
	TDataModule2* test{new TDataModule2(this)};
public:
	__fastcall TTestResource1(TComponent* Owner);
	void Get(TEndpointContext* AContext, TEndpointRequest* ARequest, TEndpointResponse* AResponse);
	//Custom SuffixName = zip/{z1}/{z2}
	void GetItem(TEndpointContext* AContext, TEndpointRequest* ARequest, TEndpointResponse* AResponse);
	void GetFullZip(TEndpointContext* AContext, TEndpointRequest* ARequest, TEndpointResponse* AResponse);
	void Post(TEndpointContext* AContext, TEndpointRequest* ARequest, TEndpointResponse* AResponse);
};

Added setting to register function.

////
static void Register()
{
		std::auto_ptr<TEMSResourceAttributes> attributes(new TEMSResourceAttributes());
		attributes->ResourceName = "test";
		attributes->ResourceSuffix["GetItem"] = "{item}";
		//add to
		attributes->ResourceSuffix["GetFullZip"] = "zip/{z1}/{z2}";
		RegisterResource(__typeinfo(TTestResource1), attributes.release());
}

Place TFDConnection+TFDQuery on the other data module(TDataModule2).

//USEFORM("Unit2.cpp", DataModule2); of that time _libmain() file is commented out.

Add member functions.

////
class TDataModule2 : public TDataModule
{
__published:	// IDE で管理されるコンポーネント
	TFDConnection *FDConnection1;
	TFDQuery *FDQuery1;
private:	// ユーザー宣言
public:		// ユーザー宣言
	__fastcall TDataModule2(TComponent* Owner);

	//added this.
	TJSONObject* __fastcall zipnum_to_json(String p1, String p2);
};

Function implementation.

////
TJSONObject* __fastcall TDataModule2::zipnum_to_json(String p1, String p2)
{
	constexpr wchar_t zip_sql1[] 		= L" = '%s%s' ";
	constexpr wchar_t zip_sql2[] 		= L" like '%s%%' ";
	constexpr wchar_t ziptable_sql[] 	= L"select * from T_ZIP where zip_id";
	String zip_sql;
	TJSONArray* json1 = new TJSONArray();
	try
	{
		(p2.Length() == 0)?
			zip_sql = ziptable_sql + Format(zip_sql2, ARRAYOFCONST((p1))):
			zip_sql = ziptable_sql + Format(zip_sql1, ARRAYOFCONST((p1,p2)));
		FDQuery1->SQL->Text	= zip_sql;
		FDQuery1->Active    = true;
		while (! FDQuery1->Eof)
		{
			TJSONObject* _line = new TJSONObject();
			for (auto Field:FDQuery1->Fields)
			{
				_line->AddPair(new TJSONPair(Field->FieldName, Field->AsString));
			}
			json1->Add(_line );
			FDQuery1->Next();
		}
		FDQuery1->Active       = false;
	}
	catch(Exception& e1)
	{
		json1->Add(new TJSONPair("error", e1.Message));
	}
	return new TJSONObject(new TJSONPair(L"zipnum_to_json",json1));

}

The argument of this function(zipnum_to_json) is the first half and the second half of the postal code.

Finally TJSONObject* is returned.

Add TDataModule2* test{new TDataModule2(this)}; to TTestResource1. Includes are also required.#include "Unit2.h"

///
void TTestResource1::GetFullZip(TEndpointContext* AContext, TEndpointRequest* ARequest, TEndpointResponse* AResponse)
{
	String z1 = ARequest->Params->Values["z1"];
	String z2 = ARequest->Params->Values["z2"];
	AContext->Response->Body->SetValue(
		test->zipnum_to_json(z1, z2),false);
}
void TTestResource1::GetItem(TEndpointContext* AContext, TEndpointRequest* ARequest, TEndpointResponse* AResponse)
{
	String z1 = ARequest->Params->Values["item"];
	AContext->Response->Body->SetValue(
		test->zipnum_to_json(z1, ""),false);
}


http://localhost:8080/test/zip/112/0004 to access.


http://localhost:8080/test/100


Use Powershell to Install IIS for RAD Server EMS production environment [JAPAN]

$
0
0

RAD Server が提供する機能のうち、中間サーバの機能は IIS または Apache で動作します。このインストールですが、運用環境向けのインストール手順を見ると docwiki には IIS のインストール手順が以下のように掲載されています。

  1. [コントロール パネル|プログラムと機能|Windows の機能の有効化または無効化]を選択します。
    メモ: これには特権モードが必要です。
  2. [Windows の機能]ダイアログ ボックスの[インターネット インフォメーション サービス]ノードを展開し、以下を行います。

    • [Web 管理ツール]の[IIS 管理コンソール]のチェックをオンにします。
    • [World Wide Web サービス]の[アプリケーション開発機能]を展開し、[ISAPI 拡張機能]と[ISAPI フィルタ]のチェックをオンにします。
    • [World Wide Web サービス]の[HTTP 共通機能]を展開し、同様に[既定のドキュメント]、[ディレクトリの参照]、[HTTP エラー]、[静的コンテンツ]のチェックがオンになっているか確認します。
  3. [OK]をクリックして、インストールを開始します。

http://docwiki.embarcadero.com/RADStudio/Seattle/ja/運用環境への_EMS_サーバーまたは_EMS_コンソール_サーバーのインストール

Add Windows Media Player to your Delphi Applications.

$
0
0

Delphi ships with a component ‘TMediaPlayer’ for playing media files such as video and audio. This component remains in Delphi for the sake of compatibility with older versions, but is quite out-dated and, due to a decreasing number of compatible codecs, it is becoming difficult to maintain. There is however an alternative component for Windows, the Microsoft Windows Media Player ActiveX component.

[ Read how to use Windows Media Player in your Delphi applications here. ]


Fun with Delphi Contest: NASA API Mashup

$
0
0

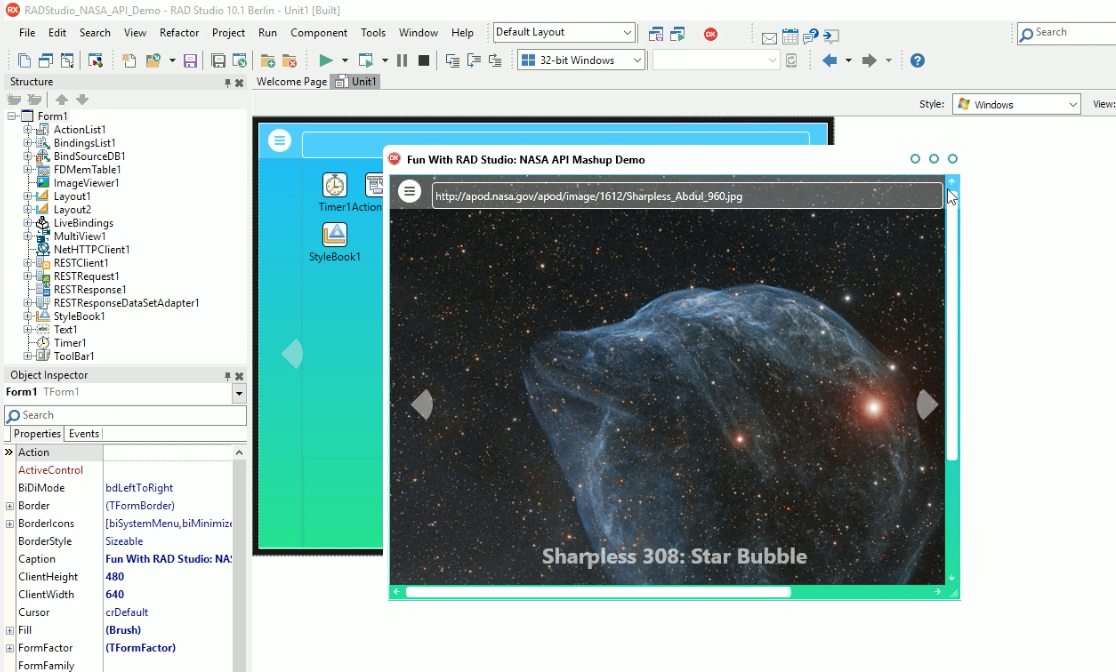
Embarcadero is promoting a contest for applications that leverage OpenData, in particular the NASA API (available at https://api.nasa.gov/index.html). Given the large amount of data available, there is room for building many different applications. Also, you can submit Windows or Mobile applications, as long as it is built with RAD Studio.

Full announcement and competition details are at:
https://community.embarcadero.com/competitions/8-fun-with-delphi-nasa-api-mashup

We have a sample application on GitHub at https://github.com/EmbarcaderoPublic/FunWithRADStudio/ with a video at https://youtu.be/pARtydMW_GQ and accept submissions on GitHub and with a companion video. All of the information is at the page above.

While this isn't strictly tied to my "Fun Side of Delphi" old material, there is a clear relationship in terms of thinking out of the box and coming up with amusing demos, which also include some technical challenge.

We are waiting for your submission, a nice prize, and visibility in the Delphi community. So, start browsing the APIs and get to coding... submissions are due by the end of the month.

Task-Bar Icons in Delphi

$
0
0

Under Windows 7, the familiar task bar underwent something of an overhaul. Tasks which once represented the title bar of an application were replaced with icons, each of which supports application previews, progress indicators, and overlay icons to provide additional information about the state of the application. In this post, I’d like to show you how you can interact with these icons to provide the same feedback for your Delphi applications.

[ Read More Here ]


Use C++Builder, connect to AWS API Gateway+(Node.js)Lambda with JSON[JAPAN]

$
0
0

Use C++Builder, connect to AWS API Gateway+Lambda with JSON.

Inside of AWS Lambda echoes the contents of post JSON.

/////
exports.handler = (event, context, callback) => {
    callback(null, event);
};

The function name is "test_function". And save it.

Make this Lambda"test_function" accessible from the Internet using Amazon API Gateway.

////
	TJSONArray*    __fastcall EchoStrings(TStrings* ss);

It seems of member function of DataSnap sample"EchoString()".


In TButton to make such Form, to call the EchoStrings(TStrings* ss).

////
TStringStream* __fastcall TForm1::str_stream_to_json(TStrings* ss)
{
	TStringStream* ms{nullptr};
	auto ja = new TJSONArray();
	int i{0};
	try
	{
		try
		{
			for (auto line_: ss)
			{
				ja->Add(new TJSONObject(new TJSONPair(
					Format("value_", ARRAYOFCONST((i)) ), line_) ));
				i++;
			}
		}
		catch(Exception& e1){}
		ms = new TStringStream(ja->ToJSON());
	}
	__finally
	{
		delete ja;
	}
	return ms;
}

TJSONArray* __fastcall TForm1::EchoStrings(TStrings* ss)
{
	std::unique_ptr<TNetHTTPClient> net_cliant_{new TNetHTTPClient(nullptr)};
	auto ms = str_stream_to_json(ss);
	_di_IHTTPResponse http_;
	net_cliant_->ContentType = "application/json";
	if (ms != nullptr)
	{
		try
		{
			http_ = net_cliant_->Post( "https://******/test-function?a=1",
				ms);
			std::unique_ptr<TStringStream> ms1 = std::make_unique<TStringStream>(static_cast<UnicodeString>(L""), TEncoding::UTF8, true);
			ms1->LoadFromStream(http_->ContentStream);
			ms1->Position = 0;

			return static_cast<TJSONArray*>((
				static_cast<TJSONObject*>(TJSONObject::ParseJSONValue(ms1->DataString))
				)->GetValue("body-json"));
		}
		catch(Exception& e1)
		{
			return nullptr;
        }
	}
	else
        return nullptr;
}

void __fastcall TForm1::Button1Click(TObject *Sender)
{
	for (auto value_: EchoStrings(Memo1->Lines)) {
		Memo1->Lines->Append(
			static_cast<TJSONObject* >(value_)->GetValue("value_")->Value());
	}
}

Return contents written in Memo1 as TStringStream.

Reply in JSON like this.This is data returned by the Amazon API Gateway.

{
    "body-json": [
        {
            "value_": "English"
        },
        {
            "value_": "日本語"
        },
        {
            "value_": "русский"
        },
        {
            "value_": "한국"
        }
    ],
    "context": {
        "user-arn": ""
    },
    "params": {
            "X-Forwarded-Proto": "https"
        },
    "stage-variables": {}
}


Viewing all 503 articles
Browse latest View live


<script src="https://jsc.adskeeper.com/r/s/rssing.com.1596347.js" async> </script>